How To Grow Swiss Chard Microgreens
Swiss chard microgreens are slightly sweet and vegetal, and are a great addition to salads or sandwiches. They're great for growing year-round, even in the middle of winter where nothing is growing outside. We explain how to grow them in this complete guide.

Contents
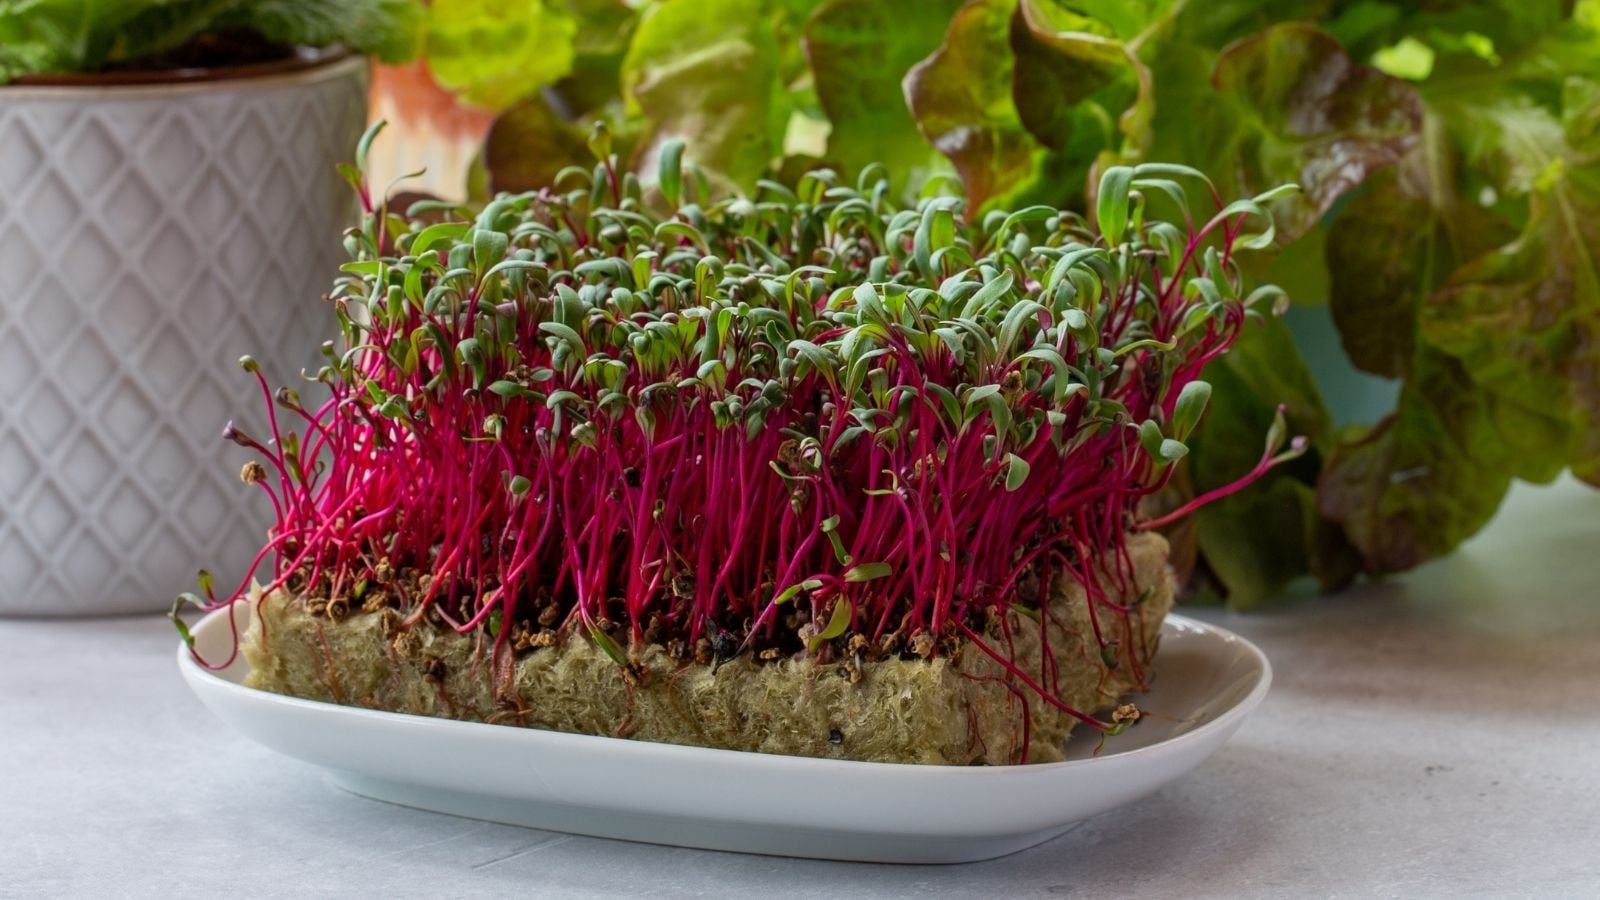
If you picture plain green sprouts when you think of growing microgreens, it is time to meet Swiss chard microgreens. With brightly colored stems and soft green leaves, they add vibrant color to meals. Why settle for a green salad when you can include orange, yellow, or red chard microgreens?
Swiss chard microgreens have a sweet, earthy flavor similar to beets, which makes sense since they belong to the beet family, Beta vulgaris. They are rich in nutrients, including vitamins A, B, C, and K, along with dietary fiber and protein. Adding Swiss chard microgreens to sandwiches and salads is an easy and flavorful way to boost nutritional value.
Like many other microgreens, Swiss chard microgreens grow well indoors year-round under grow lights. Once you start growing them, you never have to worry about running out. Swiss chard microgreens are simple to grow, making them an ideal choice for home gardeners ready to enjoy fresh, colorful microgreens.
Apple Blossom Swiss Chard Blend Baby Greens

Apple Blossom Swiss Chard Blend Baby Greens Seeds


Materials

Before you can begin to grow Swiss chard microgreens, you have to gather the materials. Then, with a little patience and daily care, you’ll have some crunchy greens to enjoy in one to two weeks.
Here’s a list of our favorite varieties of Swiss chard microgreens to choose from. Our favorite mix that includes Swiss chard is from Botanical Interests, and it’s linked below.
- Barese Dark Green Smooth Leaf Swiss Chard
- Pink Lipstick Swiss Chard
- Rainbow Mixture Swiss Chard
- Ruby Red Swiss Chard
- Organic Ruby Red Swiss Chard
- Yellow Swiss Chard
- Organic Yellow Swiss Chard
- Mild Mix Microgreens
Although it is not required, use shallow trays when growing Swiss chard microgreens. Shallow microgreen trays offer several benefits, starting with better hydration. The roots do not need much soil, and a shallow layer helps the growing medium stay evenly moist without drying out too quickly.
You will need three trays to grow microgreens successfully. One tray supports bottom watering, one holds the soil and Swiss chard seeds, and a third tray sits on top during the blackout phase. Place the tray with drainage holes in the middle to improve airflow and allow proper hydration.
All trays can be the same size, although a slightly larger bottom watering tray often makes watering easier. If needed, you can grow microgreens with two trays by covering the seeds with a tea towel during the blackout period.
A bright window with plenty of natural light can support microgreen growth, but a grow light makes the process much easier. You do not need an expensive light, but position it close to the Swiss chard microgreens so they grow upright and full rather than becoming leggy or leaning toward the light.
Soaking
Soaking Swiss chard microgreen seeds is not required, but it can improve germination. You may choose to soak the seeds for up to one day before planting. Soaking softens the seed coats and helps seeds germinate more quickly.
If you prefer not to soak Swiss chard seeds, they will still grow, but germination may occur more slowly. This delay can extend the time needed before harvest.
Planting

This is where the fun begins. Once your Swiss chard seeds and materials are ready, set up the trays.
Fill the tray with drainage holes with growing medium until it sits just below the rim. Smooth the surface so it is flat. A level surface prevents Swiss chard seeds from settling into crevices and forming clumps.
Aim for a dense planting, but avoid placing seeds so close together that seedlings overcrowd and die. Spread the seeds in a thin, even layer so they sit close together without overlapping.
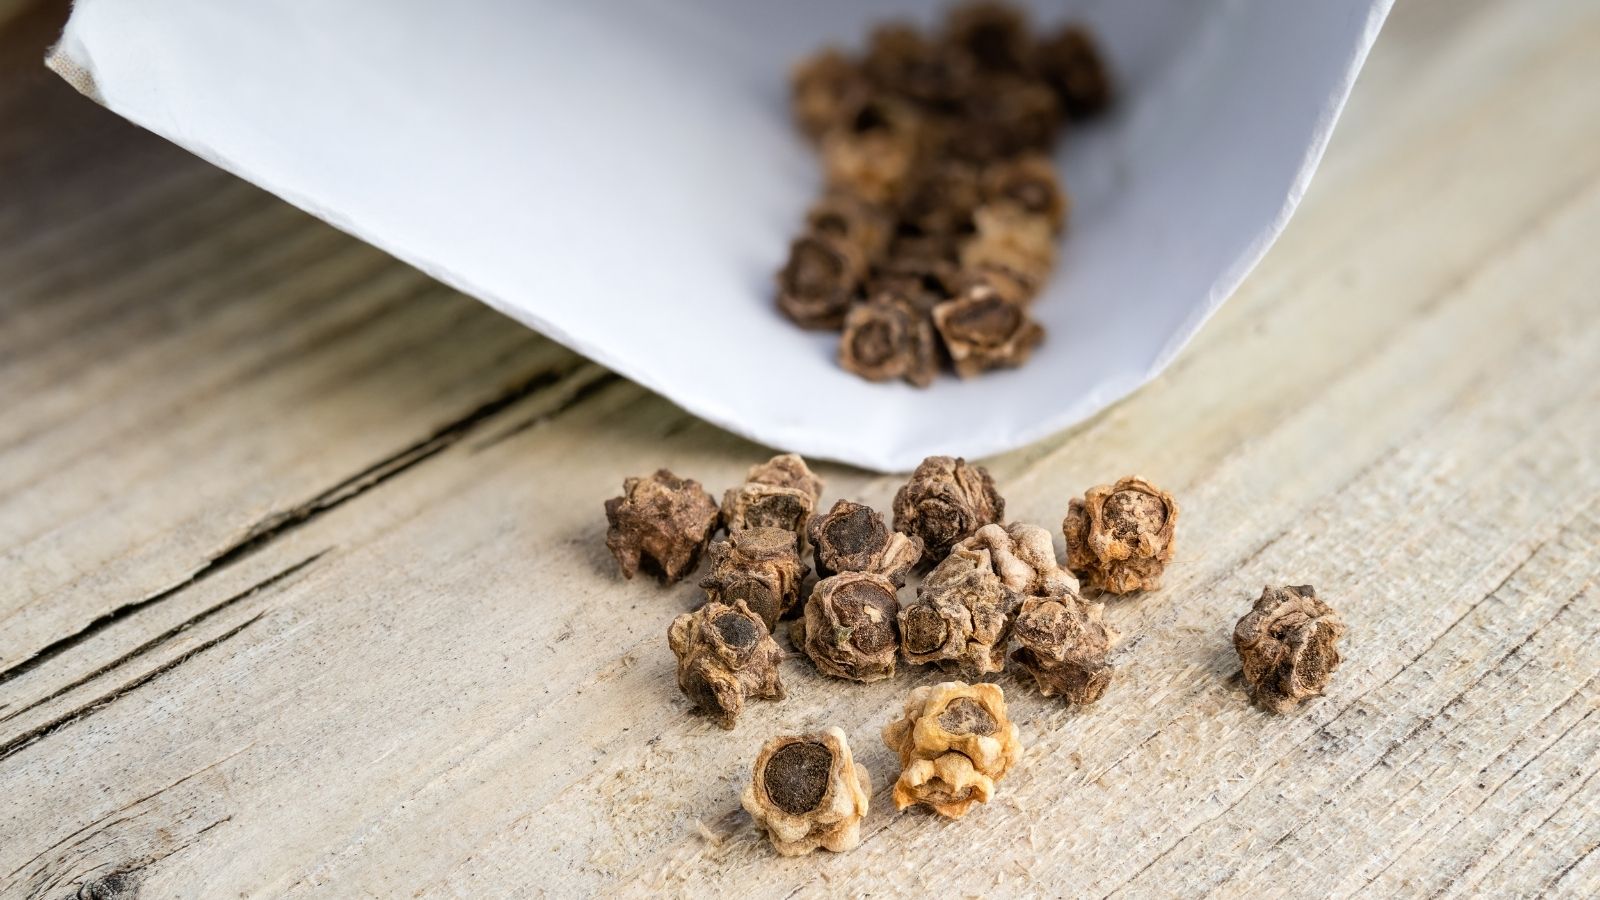
Swiss chard seeds are relatively large, so you need less seed density than you would for smaller seeds such as mustard greens. Their size is similar to beet seeds.
Mist the soil surface with a spray bottle until it is evenly moist. Avoid creating puddles or streams, as running water shifts seeds and causes clumping. The seed layer should remain evenly distributed after watering.
Do not cover Swiss chard seeds with additional growing medium. As long as the seeds maintain good contact with the soil, they will germinate without issue. After moistening the seeds, place the third tray on top and set it aside.
Growing

Swiss chard seeds need to sit in the dark for three to four days. Remove the top tray periodically to mist the soil, keeping it consistently moist. You will likely spray the surface two to three times per day.
Avoid overwatering during this stage. Excess moisture encourages mold growth, and once mold appears, you will need to discard the Swiss chard microgreens and start over.
After three to four days, Swiss chard sprouts should begin emerging from the growing medium. They may appear pale yellow and weak at first, which is normal. Without exposure to light, the seedlings cannot produce chlorophyll, the pigment responsible for green coloration.
At this stage, place the seed tray into a solid bottom tray if it is not already set up for bottom watering. Add water to the lower tray and allow the soil to absorb moisture through the drainage holes as needed. Bottom watering helps reduce the risk of mold and prevents overwatering. Refill the water tray whenever it runs dry.
You can now remove the top tray permanently and introduce light. Keep Swiss chard microgreens under a grow light for 12 to 18 hours per day to mimic natural sunlight and encourage healthy growth. Position the light close to the tray to prevent leggy, weak stems.
As the microgreens grow, the stems will begin to develop color. Ruby red Swiss chard produces deep red stems, while yellow or orange varieties may remain pale yellow or light green at this early stage. Rainbow chard develops a mix of subtle colors that become more vibrant as the plants mature.
Harvesting
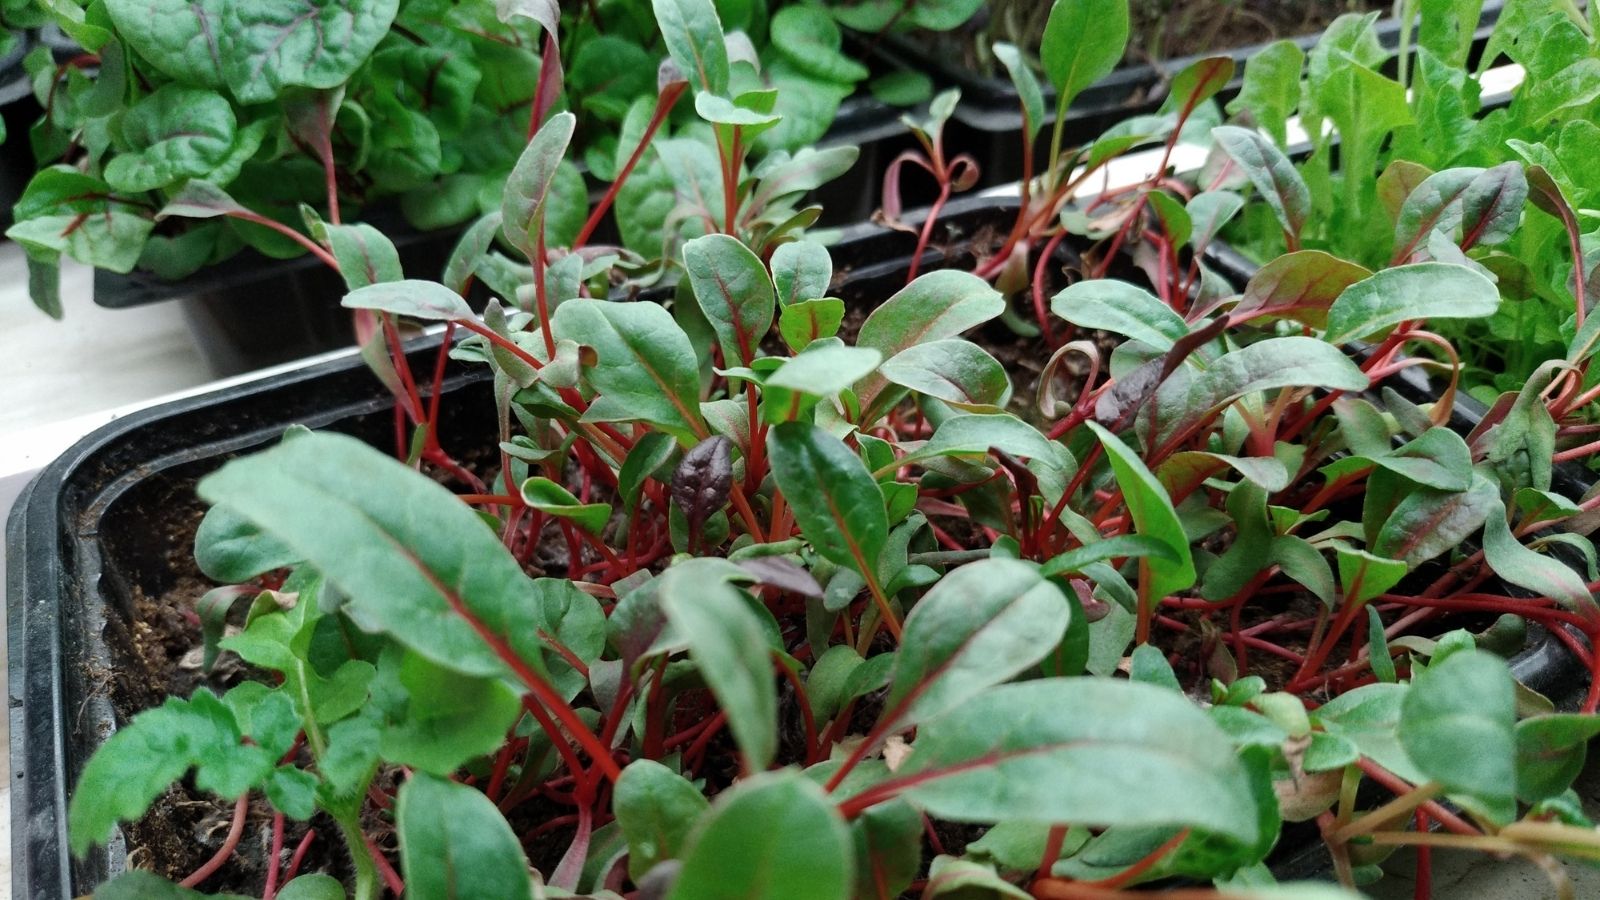
The ideal time to harvest Swiss chard microgreens is after the cotyledons appear and before the first set of true leaves develops. Cotyledons are the first two leaves to emerge. Harvest typically occurs eight to 12 days after placing the seeds on the growing medium.
If you miss this window and the microgreens develop their first true leaves, you can still harvest and eat them. The flavor will be less sweet, but the greens remain perfectly edible.
Before harvesting, you may notice seed husks stuck to the cotyledons. Gently brush your hand over the tops of the leaves to remove the husks. If a few remain, remove them by hand so they do not end up in your meal.
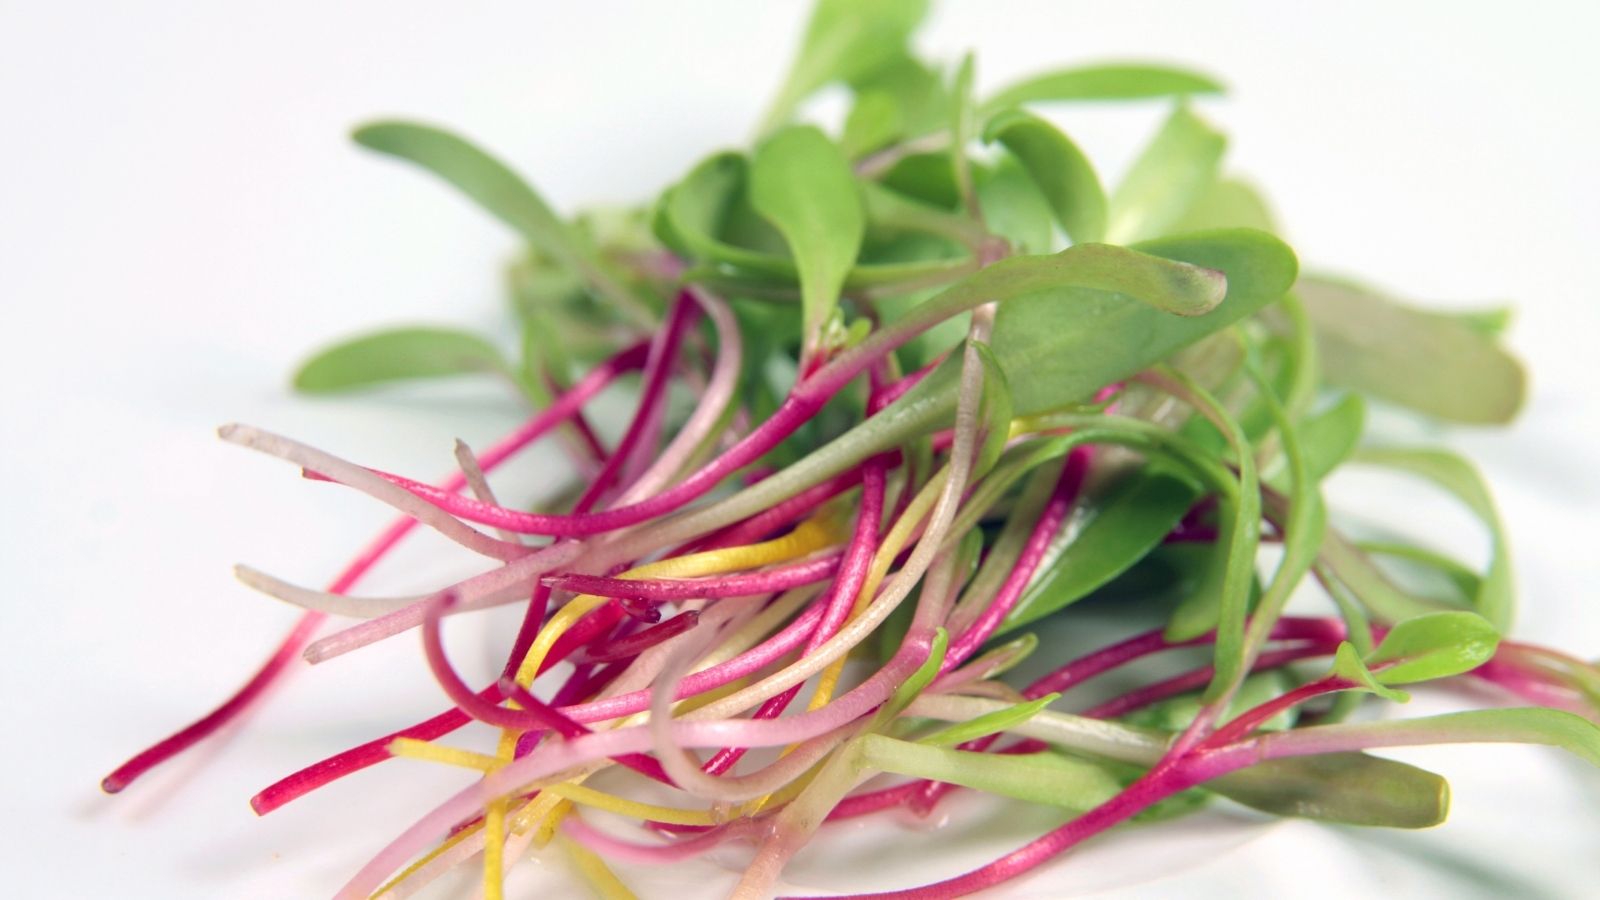
Use a sharp, clean pair of scissors to harvest Swiss chard microgreens. Cut the greens just above the soil surface, taking care not to disturb the growing medium or mix it in with the harvested greens.
Storing
You may feel tempted to wash Swiss chard microgreens immediately after harvest, but avoid doing so if you plan to store them. Excess moisture encourages mold growth and can cause the greens to spoil more quickly.
Store Swiss chard microgreens in an airtight container or plastic bag. Place one or two paper towels inside to absorb excess moisture. Properly stored microgreens keep for up to one week, although fresher greens always taste best.
Swiss chard microgreens have a sweet, earthy flavor with a light crunch. If anything smells or looks off after about one week in storage, discard them and start a new batch.
Wash Swiss chard microgreens just before eating, if needed. If the greens look clean, contain no seed husks or growing medium, and you grew them without pest issues, washing is optional unless you prefer the extra reassurance.


