How to Propagate Split-Leaf Philodendron
Split-leaf philodendron is a spectacular tropical plant that makes an excellent and dramatic houseplant. It's also quite easy to propagate if you know what works and what does not. Join houseplant enthusiast Melissa Strauss for step-by-step instructions on propagating your philodendron.


Contents
Split-leaf philodendron (Philodendron bipinnatifidum) is a stunning tropical evergreen that hails from South America. Specifically, you’ll find this growing in the subtropical and tropical rainforests of southern Brazil, Paraguay, Argentina, and Bolivia.
Often mistaken for Monstera deliciosa, this is a true philodendron, and a self-heading plant, as opposed to vining like M. deliciosa. It also goes by the name tree philodendron due to its large size and thick woody trunk base.
The name split leaf comes from this plant’s enormous, deeply lobed leaves. They can reach several feet long and have wavy, cut edges. In tropical and subtropical climates, these thrive outdoors and can grow to massive proportions. They may reach 15 feet tall with a similarly massive canopy.
Most gardeners raise these as houseplants, loving them for their large and dramatic size, which makes a major statement. It’s also easy to propagate split-leaf philodendron, so it’s easy to share with a friend or increase your own collection. Let’s talk about the different ways you can propagate it.
Choose a Method

There are three methods by which you can propagate your split-leaf philodendron. The easiest and most common of the three is by rooted cuttings. This has a high success rate with younger plants, so it’s considered the most effective method for those.
The second method is air layering, which works best for large, mature plants. It involves encouraging roots to grow on a stem while it’s still attached to the parent plant. It can be more effective than using cuttings for an older plant with thick, woody stems.
Finally, you can propagate your spilt-leaf philodendron by division. This is the fastest way to get a rooted plant, but it requires re-potting your parent plant. This works best with mature plants that have multiple stems.
Stem Cuttings
You can propagate younger split-leaf philodendrons with cuttings. However, for mature plants, the stems tend to be woody and harder to root. So this method is best for a plant that is still green and flexible. As your plant ages, there are other effective methods, though, and we will get to that in a moment.
Pick a Healthy Stem

Choosing the right stem will make or break your success with this propagation method. Your split-leaf philodendron is not a vining plant, so this is a little bit trickier than other types. You need suitable stems with visible nodes to take cuttings from.
Select a healthy section with at least one node, which is the bump where an aerial root or leaf grows. Without a node, no roots will grow. Since the nodes are all the way down by the stem, you have to cut into the stem a bit to access that tissue.
Make the Cut

This is what will make or break the process and lead to successful propagation. You have to cut slightly into the main trunk or stem, just a bit, to access the node tissue, which is where new roots will grow from. Make sure to cut in, not much, all you need is a portion of that node.
Rooting Methods
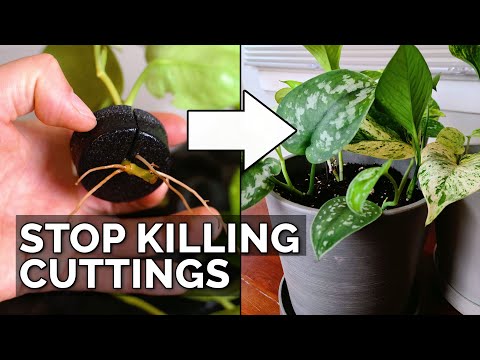
There are two ways to root those cuttings: in water or in soil. If you’re going to root in water, you don’t need rooting hormone. If you’re going the soil route, I recommend it.
Water

Place the cut end of the stem, with the portion of the node, in a clean container of water. The node needs to be submerged, but the leaf should not be. Change out the water every few days. This prevents pathogens like fungi or bacteria from infecting the cutting. Roots should begin to form in three to six weeks, so be patient; it will happen.
Soil

You can also use a soil or moss mix to propagate your split-leaf philodendron. First, dip the cut end in a root-stimulating hormone. Fill a container with a light, airy mix of peat and perlite, or damp sphagnum moss. Likewise, it will also take three to six weeks for roots to begin forming.
I prefer the water method because you can see the roots forming, and know whether your experiment is working. It’s more difficult in soil because you can’t see the roots, and checking too often interferes with the process.
Transplant and After Care

If you’re using the soil method, you won’t need to transplant after you propagate. Just leave it in its container until it needs a larger one. For water-rooted cuttings, you’ll eventually need to transplant into soil. Wait until the roots are a few inches long and firm. Then transplant into a well-draining potting mix.
In both cases, maintain warmth and humidity throughout the process and until your plant is firmly rooted in its new container. Keep the plant in bright, but indirect light for most of the day. Maintain this until the plant produces new growth.
Air Layering
Air layering is an effective and reliable way to propagate a more mature split-leaf philodendron. Because of the woody stem, it’s difficult to take cuttings with the node attached, especially as the plant ages.
When you propagate by layering, you leave the stem attached to the parent plant while it forms roots. Then, you cut the stem and its roots away and have your new plant already rooted.
Pick a Healthy Stem

Select a healthy stem that is about one-half to one inch thick. The ideal stem will be just above an aerial root or node, which is where the roots will develop. Remember that without that node tissue, roots won’t grow; this is the place on any plant where new growth forms.
Make a Cut

You do need to make a cut when you propagate by air layering, but don’t cut the leaf off altogether. Instead, make a one-inch, diagonal cut from the node up into the stem. Cut about one-third of the way into the stem. Then take a toothpick or a small piece of plastic or wood to wedge open the cut.
Wrap

Now you are ready to wrap your stem. The stem will remain attached to the plant for the duration of the rooting process, which is what makes this method successful. It is the least stressful for your new plant, as it will remain part of the parent plant until it has its own roots.
Dust the cut with rooting hormone to give it a strong start. Then, wrap the entire cut with damp (not wet) sphagnum moss, packing it around the cut area. It should feel like a damp sponge, not dripping.
You can use different materials for wrapping the moss; there are special cases made specifically for this purpose. These clip into place and are easy to open and close. They’re a good investment if you do a lot of layering. Otherwise, you can use a bag or plastic wrap to cover the moss. This will hold it on the plant and keep it moist.
Check In

It takes about four to eight weeks to propagate your split-leaf philodendron this way. In the meantime, you’ll want to check on it regularly, about every three to four days. This is to make sure that the moss remains moist. You can add water by misting with a spray bottle.
Transplant and After Care

Once you can see strong roots growing through the moss, it’s time to remove the stem and give it a new home. Use a sharp knife to slice the stem off with as much of the roots attached as possible. Plant your rooted piece in a well-draining potting mix. One made specifically for aroids is ideal. Keep it warm and humid, and in bright indirect light until new growth appears.

Division
You can also propagate your split-leaf philodendron by division. This is an effective way to make new plants if you have a large, clumping plant. These grow from a thick, self-heading base that will eventually produce offshoots or multiple stems. You can divide these off and replant them to form new plants.
Divide the Plant

It’s best to carry out this method in spring or summer, which is the active growing season for your split-leaf philodendron. Don’t try it with young plants that only have a single stem; it’s only effective with mature plants that have multiple stems.
Water the plant a day ahead of division to reduce stress. Remove the plant from its container or dig it up if it’s in the ground. Gently shake out the soil to expose the roots. Identify separate crowns with their own stems and leaves.
Separate Carefully

Each division needs to have its own stems or at least one growing point and roots. You should be able to use your hands to pull these apart, but if the roots are tangled, use a sharp knife to cut cleanly between them.
Keeping the roots as intact as possible while you clean them up. Trim away any unhealthy root tissue. Roots that are dark and mushy are rotted. Remove these and any that are dried out.
Repot

Immediately after you propagate your split-leaf philodendron, repot it in its own containers. Or, replant them in the garden. Use a fresh, well-draining soil; an aroid mix is perfect. Make sure that the crown of the plant sits at the same depth that it did previously.
After you repot your divisions, water them well. Place them in a warm, humid spot and in bright indirect light. Keep the soil moist, but not soggy. Wait until you see new growth, then fertilize lightly and care for it as you would any other specimen!


