How To Harvest and Store Sage
Knowing how to harvest sage without damaging the plant is essential. This gives you the freshest herbs to harvest and keeps the rest of the plant healthy for continued growth. We'll explain the ins and outs of this important process!

Contents
Sage is a wonderful herb to use in the kitchen and adds rich flavor to meat and vegetable dishes. It is easy to grow sage at home in the garden or even on a sunny windowsill. For anyone already growing sage or looking to start, these tips explain how to harvest sage to optimize use, storage, and overall plant health.
The botanical name for sage is Salvia officinalis. The species name ‘officinalis’ identifies sage as a medicinal herb, while ‘Salvia’ is derived from the Latin salvere, meaning to feel healthy or heal.
Sage is also closely associated with traditional holiday meals and is commonly used in stuffings, casseroles, potatoes, and meats. There is good reason for this. After heavy holiday feasts, digestion can use a little support, and sage is a well-known digestive aid. Sage has also been used as an antibacterial, anti-inflammatory, and astringent herb, with particular benefits for menopausal women experiencing night sweats.
Sage originates from the Mediterranean, similar to herbs such as rosemary, thyme, oregano, and marjoram. These herbs all thrive in hot, sunny conditions with well-draining soil. Like most herbs, sage has the strongest flavor when used fresh. However, it also dries easily for long-term storage and retains much of its flavor when properly dried.
Broadleaf Sage Seeds

Broadleaf Sage Seeds
This drought-tolerant plant also has edible, purple-blue flowers that attract pollinators, and the gray-green foliage provides an excellent contrast in the garden or containers.
Buy at Epic Gardening Shop
When to Harvest Sage

As a hardy perennial herb, sage produces edible leaves year-round. Despite this constant availability, following a few simple harvesting guidelines helps maintain healthy, productive plants with the best aroma and flavor.
As tempting as it may be, avoid harvesting from young plants during their first year. This applies to sage grown from seed as well as small, immature nursery plants. Allow the roots time to establish and enjoy the tall purple flowering spikes, which attract many beneficial insects to the garden. The flowers can also be harvested and used in floral arrangements or added to dishes as a garnish.
Harvest sage in spring and summer while plants are actively growing and before flowering begins. Sage leaves tend to lose some of their aroma after flowering, so harvesting earlier results in better flavor. As summer comes to an end and temperatures drop, leaf production slows and nearly stops during winter.
If you need sage for a winter holiday meal, harvesting a few leaves at a time will not harm the plant if done carefully. Garden sage, Salvia officinalis, is hardy in USDA zones 4 through 8, so it is usually possible to harvest small amounts even outside the main growing season.
How To Harvest Sage
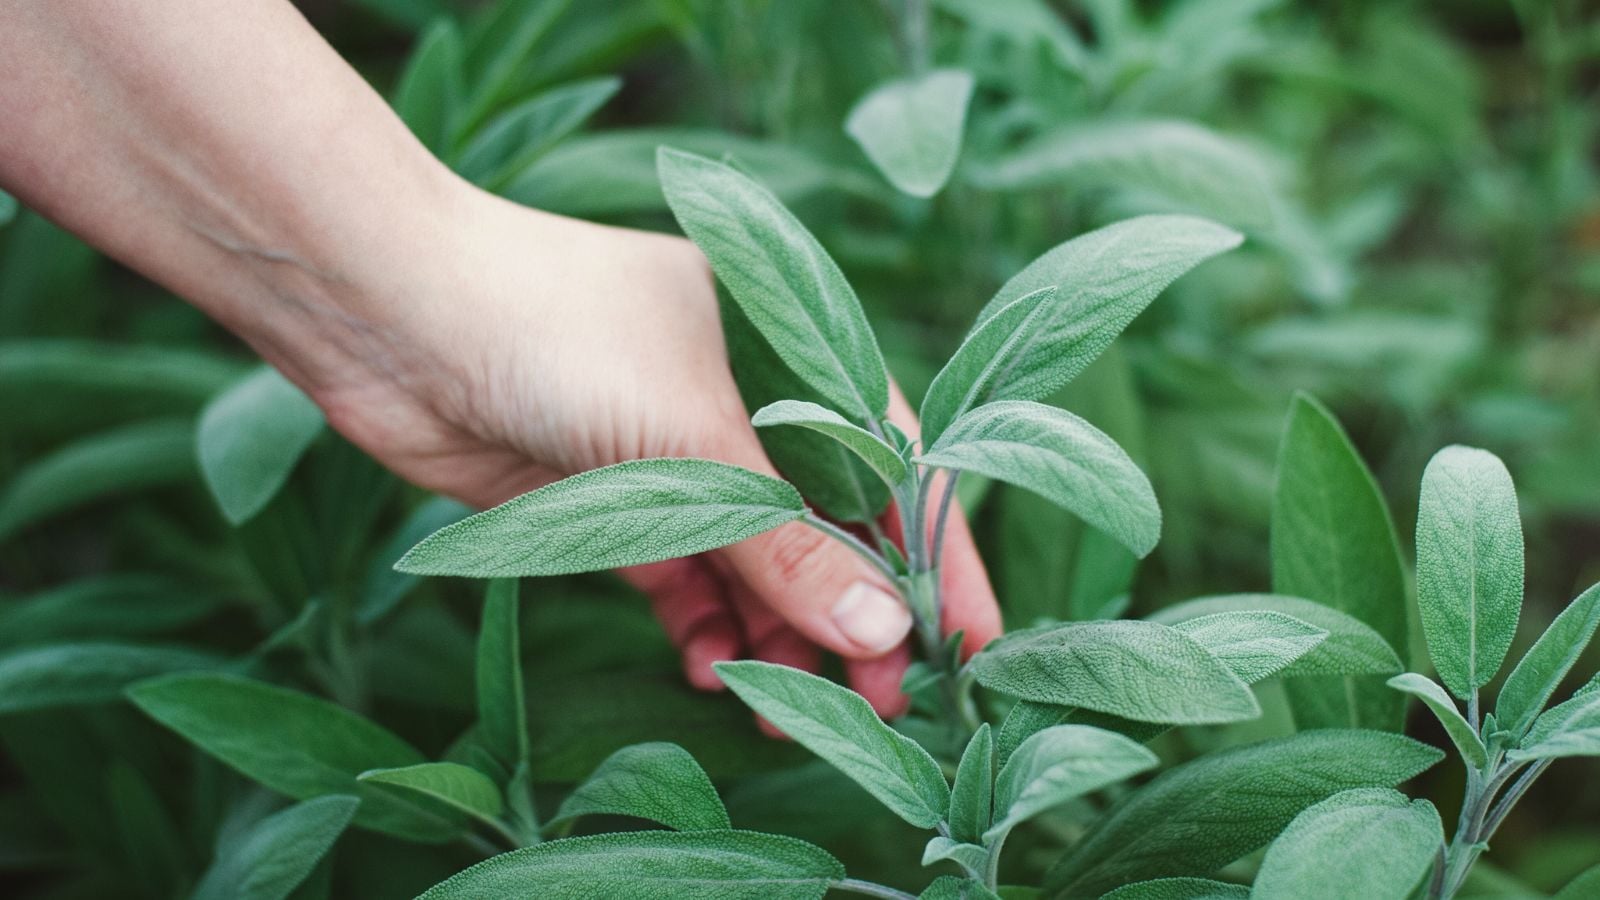
Harvesting sage depends on how and when you plan to use the leaves. If you are harvesting a few fresh leaves for a meal, simply pinching out the tips or individual leaves from a couple of sage plants is perfectly fine. These light, cut-and-come-again harvests encourage branching, resulting in a fuller, bushier plant.
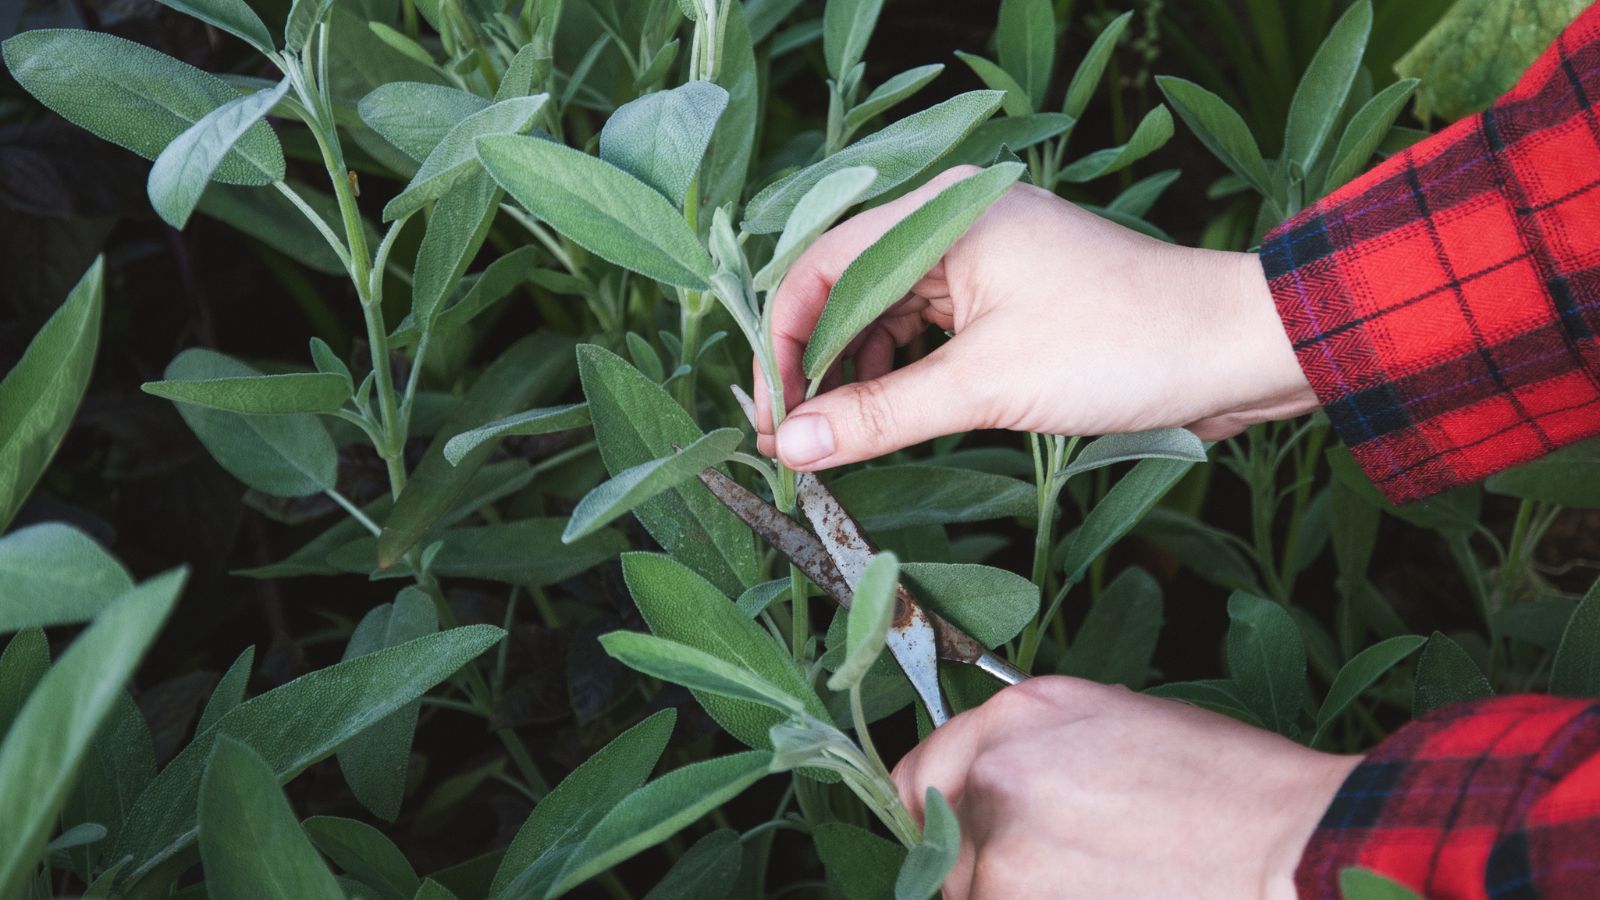
When harvesting larger quantities of sage, always use clean, sterilized pruners or scissors. Never remove more than a third of the plant at one time, as this allows the plant to recover and continue producing. A mature sage plant can provide up to three full harvests in a single season.
Avoid cutting into old, woody growth, as sage will not resprout from old wood, and heavy cuts can leave plants vulnerable to disease and environmental stress.
In fall, stop harvesting and allow the plant to rest and prepare for winter. Growing several sage plants at once helps ensure a steady supply of fresh and dried sage throughout the year, not just during the active growing season.
The best time of day to harvest sage is mid-morning, once the dew has dried but before the heat of the day sets in. Avoid harvesting during hot conditions, as the leaves can lose quality quickly.
After three to four years of regular harvesting, sage plants often become woody and less productive. At this stage, it is best to replace them with younger, more vigorous plants.
How To Store Fresh Sage
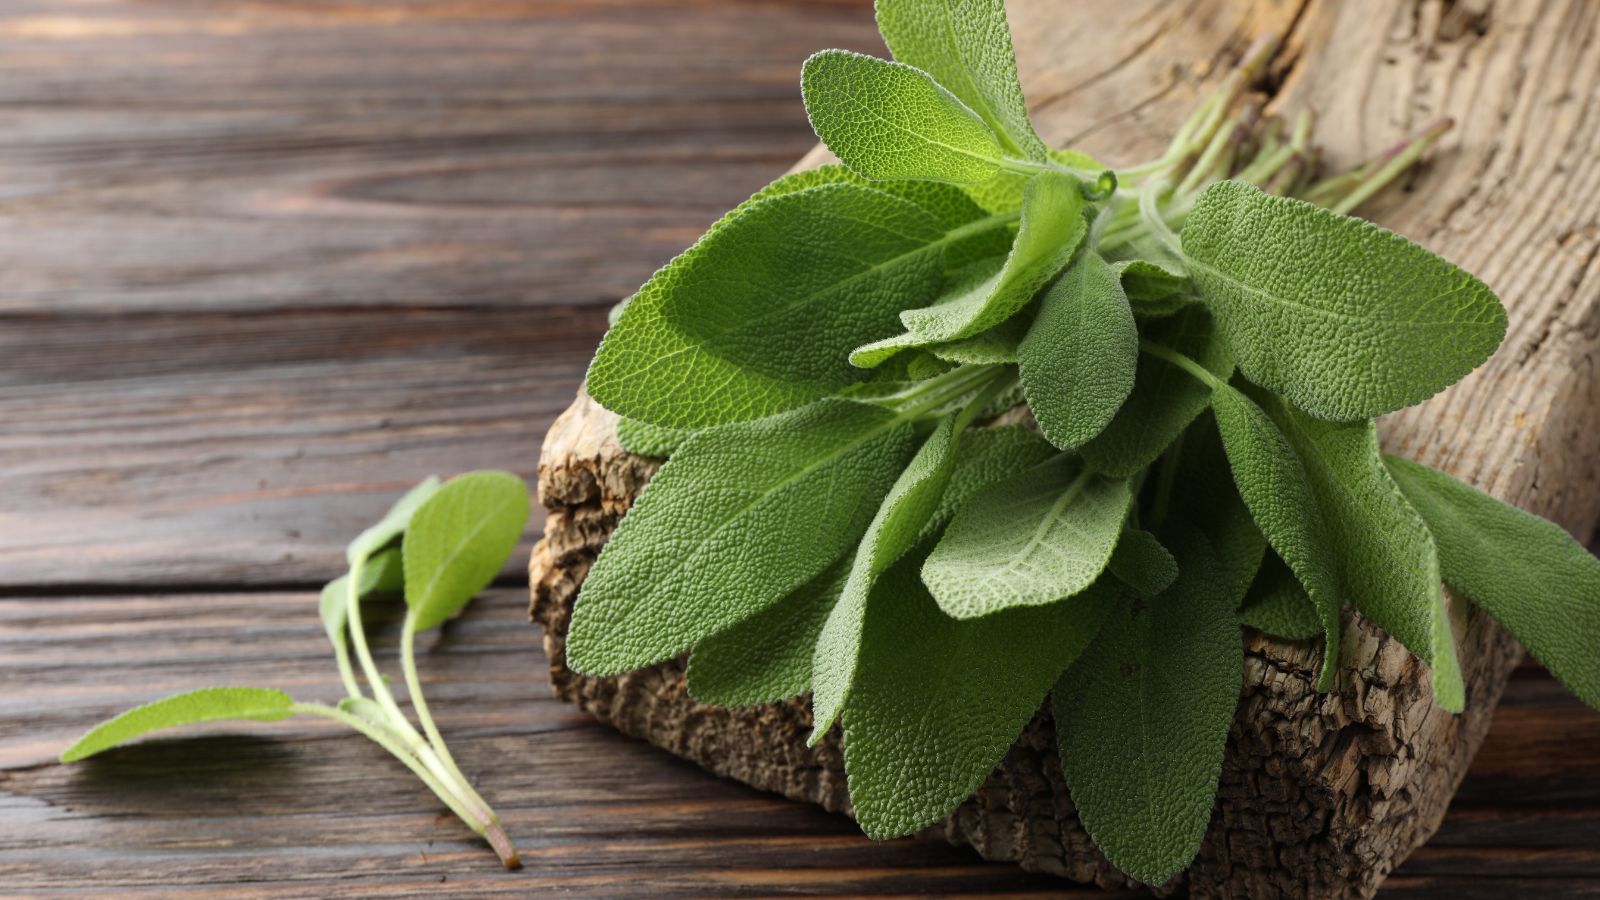
Fresh sage has the best flavor and can be stored in a few simple ways.
Sage stems can be stored in jars of fresh water on the countertop for up to a week, or in the refrigerator for seven to ten days. Change the water every few days and check the leaves daily for yellowing or mold, both of which indicate the sage is past its best. Wash the leaves just before use.
Sage will also stay fresh for up to a week in the refrigerator when stored in a plastic zip-lock bag or wrapped in damp kitchen paper. Avoid washing immediately after harvesting, as excess moisture can cause spoilage. Instead, wash the leaves just before using them.
There are three ways to freeze sage. First, wash the leaves and strip them from the stems, then gently pat them dry with paper towels.
- Lay whole leaves on a tray and place the tray in the freezer. Once the leaves are frozen, transfer them to a freezer bag.
- Fill ice cube trays with finely chopped sage. Top the trays with water and freeze. These cubes can be added directly to sauces, casseroles, stews, and other cooked dishes.
- Fill ice cube trays with finely chopped sage, then top each section with your oil of choice and freeze. These can be used to make sage butter or added to dishes in the same way as sage ice cubes.
Sage stored at room temperature without any hydration will wilt and deteriorate quickly if not used immediately.
How To Dry Sage
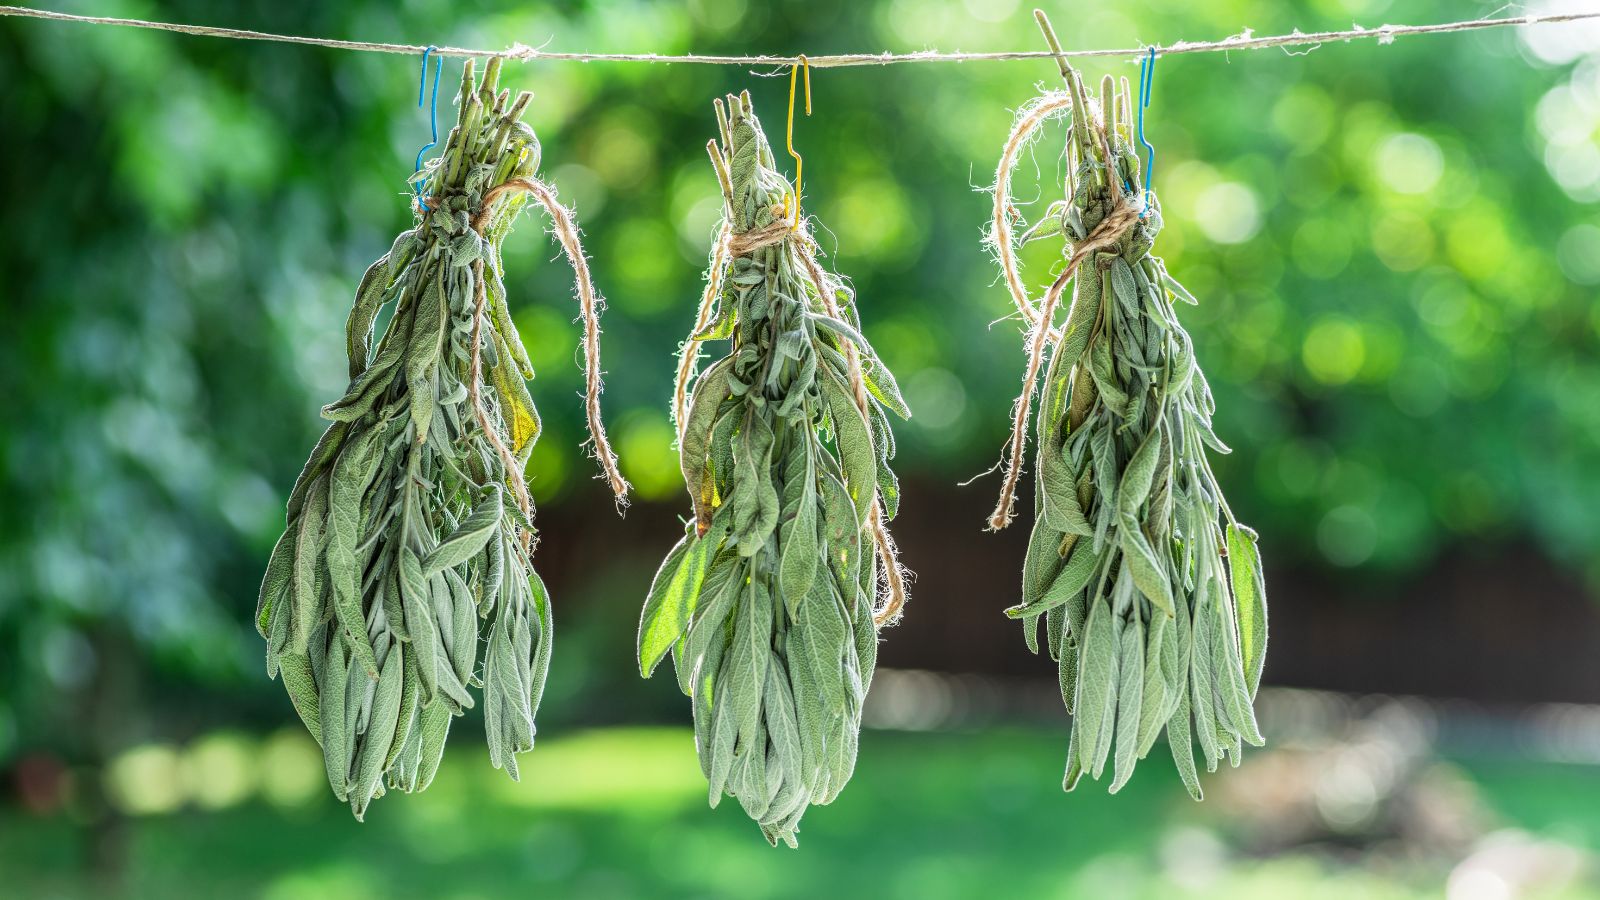
Sage leaves dry well for long-term storage and can retain good flavor for up to a year. Once dry, store the leaves whole or crumbled in airtight glass jars and keep them in a cool, dark place. There are several drying methods to choose from, depending on how quickly you want to use the herbs.
Sage has a medium to high water content, which can cause uneven drying and increase the risk of mold during storage. For all of the methods below, gently wash the leaves under cool water and shake off excess moisture before drying.
To hang dry, tie small bunches of sage with string and hang them upside down in a cool, dark, well-ventilated area. The leaves are ready when they feel crisp and crunchy. If you do not have a dark space, loosely cover the bunches with a clean paper bag to protect them from dust and light. Once fully dry, remove the leaves from the stems, crumble if desired, and store in an airtight container.
Dehydrators can be used to dry sage alongside other fruits, vegetables, and herbs. Spread the leaves evenly on the drying trays and set the dehydrator according to the manufacturer’s instructions. Once fully dry, store the leaves in an airtight container.
Oven drying dries sage in less than an hour, although some flavor and aroma may be lost due to the speed of drying. Remove the leaves from the stems and spread them evenly on a baking tray. Set the oven to its lowest temperature, place the tray in the center, and leave the door slightly ajar to allow moisture to escape. Monitor the leaves closely, as they can burn quickly. Once the leaves are crisp, they are ready to be stored.
Frequently Asked Questions
How do you harvest sage without killing the plant?
Harvest little and often or only one-third of a plant at any one time leaving a period of rejuvenation between harvests. Try not to harvest from young plants in their first year and never cut into old wood.
How do you know when sage is ready to harvest?
Sage plants are ready to harvest when they are at least one year old and have lots of healthy new growth. For best flavor, harvest leaves in spring and summer, before the plant flowers.


