How to Plant, Grow, and Care for Potatoes
Do you know how to grow potatoes? We've got tips to keep you in an abundance of spuds all year long! Follow this in-depth guide by gardening expert Rachel Garcia for everything you need to know.

Contents
As an Idahoan, I absolutely love potatoes. There are so many things you can make with them, and you can grow them in small spaces. Plus, you don’t have to live in the Spud State to join in on the fun. Potato growing can be accomplished and enjoyed practically anywhere.
Potatoes are a top staple in the human diet, along with wheat and rice. In fact, it is the most common non-cereal crop grown worldwide. These tubers hold such significance that they have been nicknamed the Apple of the Earth. They even play a role in pop culture (just ask Mr. Potato Head).
As well as being popular, potatoes also hold a place in history. They were the first crop grown in outer space. In 1995, the white potato was planted in the Space Shuttle Columbia’s microgravity astroculture lab. This experiment opened the potential for astronauts to grow food and clean the air while traveling through space.
Potatoes also have a tragic history. In the 19th century, they were nearly the sole food source in Ireland. A blight epidemic wiped out almost all the crops, causing a devastating famine. This stands as a powerful example of why biodiversity is essential in agriculture.
If you decide to grow these terrific tubers, you’ll end up with a delicious harvest and definite bragging rights. After all, not many people can say they grow their own French fries.
Clancy Potato Seeds

We’re excited about a potato grown from seed! ‘Clancy’ grows in a diversity of colors and has great quality; it even won the 2019 All-America Selections award! Small, ¾”-1½” potatoes are both round and fingerling shaped with smooth skin in a mix of shades between rose gold and red. This “creamer” potato has a pale yellow to white interior and creamy texture when cooked.
Buy at Epic Gardening ShopQuick Care Guide

|
Scientific Name
Solanum tuberosum
Days to Harvest
10-20 weeks
Light
Full sun
Water
Medium, consistent
|
Soil
Well-draining, fertile
Fertilizer
2x a year; balanced or low-nitrogen
Pests
Colorado potato beetle, Leafhoppers
Diseases
Common scab, late blight, Fusarium dry rot
|
All About Potatoes
Solanum tuberosum is native to South America. It was introduced to Europe but was not popular at first because its flowers resembled those of the poisonous Atropa belladonna. Eventually, the true value of these tubers became clear and they gained recognition as an inexpensive and filling food. Today, gardeners everywhere are learning how to plant potatoes and manage each stage of their growth.
Potatoes are grown in zones 2 through 11 as annuals. The plants reach one to one and a half feet tall and wide with leafy, grass green growth. Below the soil, they produce round or oblong tubers in shades of white, red, yellow, purple, and blue. Depending on the variety, tubers can grow up to four inches in diameter or even larger. These spuds are incredibly productive, often yielding 25 pounds of potatoes from just one pound of seed.
It is important to note that potatoes can be poisonous if handled incorrectly. When tubers are exposed to sunlight, they turn green. With that color change comes solanine, a chemical that is mildly toxic to humans. Fortunately, this is easy to avoid by keeping tubers covered with soil during growth or by cutting off any green areas after harvest.
Potato Varieties

There are over 100 varieties of potatoes, so you have plenty of choices. The first thing to consider is when you want to harvest and how you plan to cook them. Early varieties are usually picked before they are fully mature. Because of this, they are generally small and have very thin skin. You may hear them called salad or new potatoes.
First early potatoes are planted in early to late spring and are ready to harvest in 10 to 12 weeks. The second early varieties take a little longer, planted in late spring and harvested in 13 to 16 weeks. Both types are excellent choices for container gardens or a raised bed.
The other potato varieties are called maincrops. They are planted in mid to late spring and take about 20 weeks to mature. Unlike the early types, maincrops are not harvested until they are fully grown. The result is a large crop of big tubers with thick skins.
Fingerling potatoes are often confused with salad types because of their small size. However, these tubers are bred to be small and thin-skinned when fully mature. Salad potatoes get their size from being harvested early.
Along with harvest times and uses, you also have a wide range of colors to choose from. Red potatoes, like the ‘Red Norland’, are thin-skinned with a slightly sweet flavor and creamy texture. White potatoes have similar qualities but are denser with a fuller flavor. Yellow or golden potatoes, such as ‘Yukon Gold’, are moist and buttery with a waxy skin. Red, white, and yellow varieties are all outstanding when roasted.
If you want something more eye-catching, try a blue or purple variety like ‘Magic Molly’. These tubers have vivid color inside and out. They are firm and moist, making them excellent for baking and boiling. Finally, there are classic russet potatoes, such as the ‘Caribou Russet’. With their thick brown skin and dense, floury texture, they are the most popular type for baking.
Planting

You can start buying seed potatoes in mid to late winter, either online or in gardening stores. Find out when to plant potatoes by looking up the expected date of the last frost in your area. You should sow the seeds two to three weeks before that date. The plants usually emerge around the last frost. These are cold-hardy crops, so you don’t have to worry too much about timing since they can survive light frost.
Get a head start by chitting your potatoes, which means allowing them to sprout a few months before planting. Put each potato in an egg carton, muffin tin, or another divided container. The eyes should face upward, since that is where sprouts form. Place the container in a sunny but cool spot, around 50°F (10°C). In a little over a month, you should see white shoots emerging from each eye. When they reach about an inch long, they are ready to plant in your garden or raised bed.
If you are planting in the ground, use the ridge and furrow method to optimize water usage. Form raised ridges of soil about six inches tall. Between each row, create a shallow valley or furrow a few inches deep. Plant your seed potatoes two to three inches deep with the sprouts facing upward.
Spacing is essential for potatoes. They need plenty of room to develop their tubers, and proper spacing ensures a larger harvest.
Planting potatoes on top of ridges and irrigating in the furrows keeps the plants from becoming waterlogged. If you live in a very dry area, plant potatoes in the furrows instead to help conserve soil moisture.
Growing in Containers
Growing potatoes in containers is an excellent option for small spaces. You can use almost any container as long as it is larger than a potato plant and has drainage holes. Fill one-quarter to one-third of the container with well-draining soil and plant the seeds at least six inches apart.
As your potato plants grow, add soil or mulch around them so only the top of the stem remains exposed. This encourages more root and tuber growth underground, which leads to a bigger harvest. Make sure all tubers stay completely covered. If exposed to sunlight, they will turn green and develop solanine, a mildly toxic chemical.
We also have a helpful video on growing potatoes in grow bags that explains the hilling process in detail.
How to Grow
So, how are potatoes grown? The answer is simple: give them lots of sun, soil nutrients, and love. Here’s what you should know.
Light

Choose a location that allows your potatoes to grow in full sun. Although the tubers are frost-hardy, the green growth isn’t. In high heat, your plants may need some protection from the sun.
Water

While you are growing potatoes, water them regularly so the soil does not dry out. Since bacteria thrive in heat and humidity, water only at the base of the plant. Try to water in the morning so any splashed foliage has time to dry during the day. A soaker hose is a great option for providing slow, consistent moisture.
When the foliage begins to die back at the end of the growing season, stop watering your potatoes. They need this period to dry out and set their skins. If they receive too much moisture at this stage, they may begin to rot instead.
Soil

You can plant potatoes in nearly any soil texture except heavy clay. The soil must be well-draining and rich in organic matter. Till the soil before planting so it is loose enough for the tubers to expand without resistance.
Add compost to the soil in fall or a couple of months before planting. Because acidic soil helps prevent scab, aim for a pH between 4.2 and 7.0. For the best results, use agricultural sulfur to lower the pH if needed.
If you are planting in grow bags, remember to start with fairly shallow soil and gradually hill your potato plants as they produce new growth. This hilling process allows potatoes to form along the length of the stem, increasing your harvest.
Temperature
It needs temperatures within 40 to 80°F (4-27°C) to thrive, though 60-70°F (16-21°C) is ideal.
Fertilizing

To keep your potatoes growing well, pay close attention to the nitrogen you are supplying. This macronutrient is responsible for green growth. Take advantage of that by applying a balanced or high nitrogen fertilizer to the soil just after planting.
After the leaves have fully developed, the tubers will begin to bulk up. Support this stage by applying a side dressing of fertilizer higher in potassium and phosphorus. Switching to lower nitrogen at this point is essential because it helps the plant focus on tuber production rather than foliage.
Use a granular, slow-release fertilizer for potatoes since it reduces maintenance. Chemical fertilizers can burn plant tissue if they touch the stems or leaves, so apply them two to four inches away from the base of the plant. Organic fertilizers can be applied right up against the stem without risk.
Pruning
You’re off the hook here! The only time you have to prune potatoes is if part of the plant is pest or disease-ridden. If you do this, be sure to use clean, sharp clippers.
Propagation

Potatoes are propagated vegetatively through seed potatoes, which are simply tubers replanted the following spring. Even after harvest, seed potatoes remain viable because of the nutrients stored in their flesh. You will often hear seed potatoes referred to as volunteers, while crop tubers are called progeny.
If your seed potato carries any disease, it will spread to the soil and to other potatoes you grow. To prevent this, seed potatoes are usually produced in sterile environments so they are as healthy as possible. Buying from reputable suppliers that specialize in seed potatoes is the best way to keep your garden disease-free.
If you are just experimenting, you can grow potatoes from old seed potatoes or even from store-bought ones. Choose tubers that are fully mature and have developed eyes, which are the small divots on the surface. Seeds must be firm and blemish-free. They can have sprouts, but avoid any with white roots already growing.
Start by chitting potatoes about six weeks before planting. Place them in a sunny, cool spot so they can sprout. You will see small shoots forming from each eye, which eventually develop into white roots. The goal is to chit them but plant before the white roots appear, since they break off easily during planting.
Many gardeners cut their seed potatoes so they can grow multiple plants from one tuber. Cut each seed into one to two-inch pieces, making sure each piece contains at least two to three eyes.
Here is a great video on preparing seed potatoes if you are starting with a larger tuber.
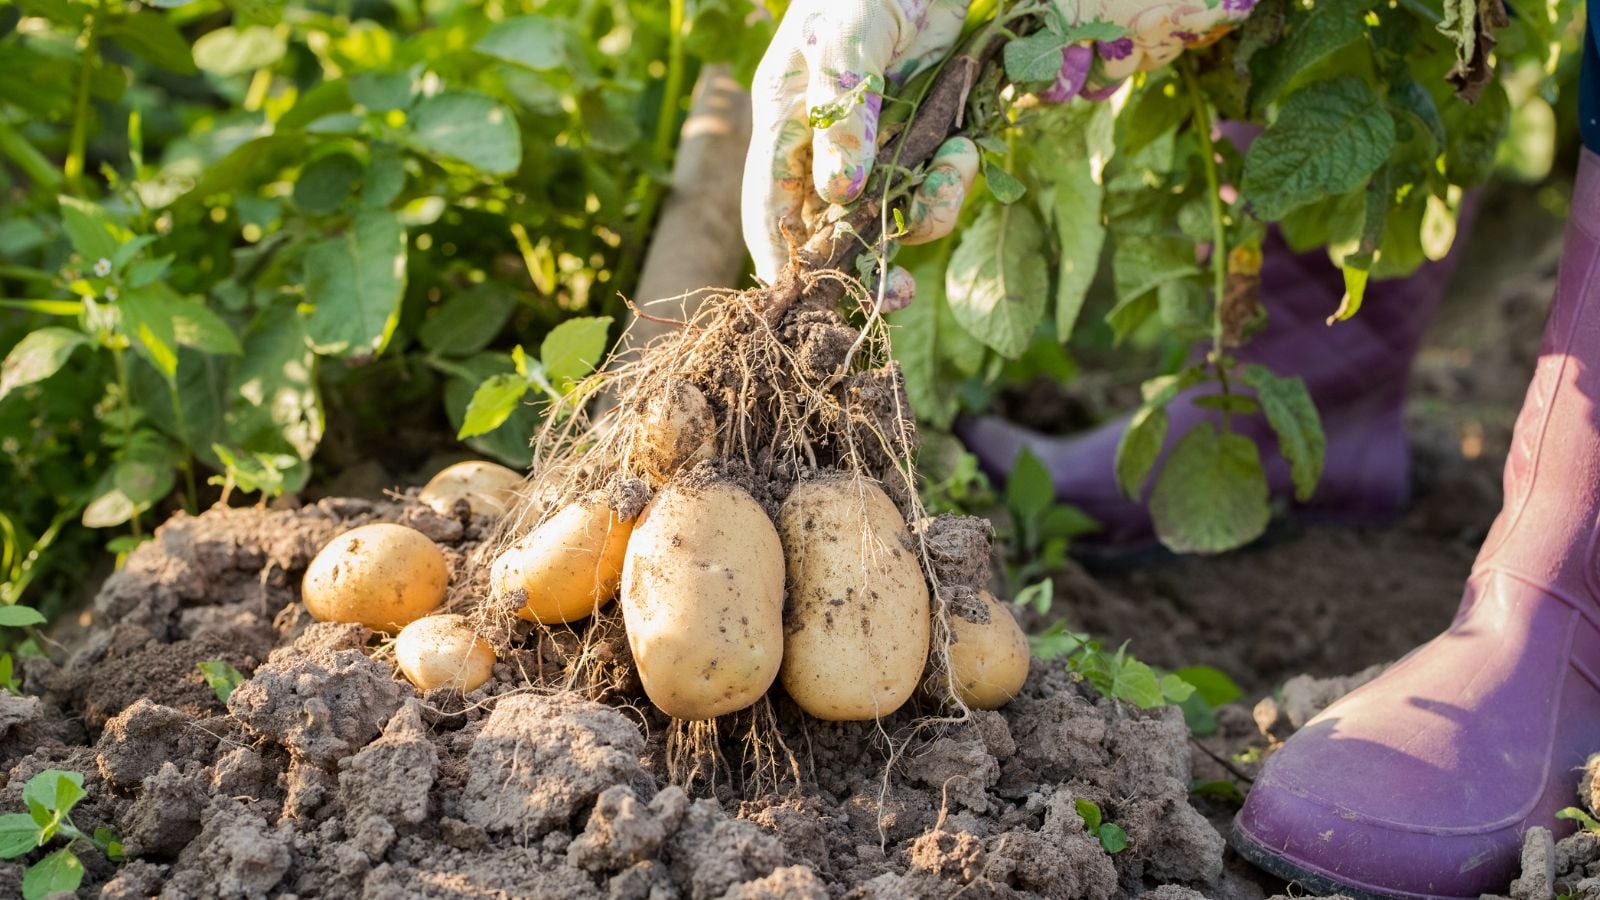
Harvesting

For early varieties, you can begin harvesting once the flowers bloom. The tubers should be about the size of an egg or larger. Late varieties should not be harvested until the foliage yellows and begins to die back. After this point, leave the tubers in the soil for an additional 10 days so the skins can dry and toughen.
Use a shovel or hand trowel to dig up the tubers, taking care not to nick them, since damaged tubers are more vulnerable to disease. If you grew your potatoes in containers or bags, simply pull out the plant, dump the soil onto a tarp, and pick out the tubers. Check for and discard any diseased potatoes and make note of issues you may need to address before the next season. Do not wash the tubers yet, as they need to be completely dry before storage.
Storing

Most potato diseases will continue to spread after harvest, so infected tubers are not suitable for long-term storage. Choose only the healthiest potatoes and place them in an aerated container such as a basket, cardboard box, or mesh bag. Avoid plastic, which traps moisture and shortens shelf life.
Store your potatoes somewhere cold, humid, and dark. The temperature should be around 45 to 50°F (7 to 10°C). Avoid the refrigerator since it is far too cold and will change the texture of the tubers. Check your stored potatoes regularly and remove any that soften or develop spots. They should last through fall and winter, after which they will begin to sprout in spring.
Long-term storage options for potatoes include freezing, dehydrating, or freeze-drying. You can also preserve potatoes by pressure canning.
Troubleshooting
Although there are resistant varieties, pests and diseases can be very dangerous to potato plants. Rotating your crops with plants of a different genus is one of the most effective things you can do to prevent these problems. Here are some other good solutions you should know.
Growing Problems

It’s a big disappointment to have lots of leafy growth but a low tuber yield. This is usually caused by a lack of soil nutrients when the tubers are forming. Make sure the soil is fertile before planting and apply fertilizer after the leaves have developed. Choose a fertilizer that is higher in phosphorus and potassium so more energy is directed toward tuber growth.
Inconsistent watering can cause the leaf tips to yellow and the tubers to crack. It can also stunt growth or even kill the plants. Maintain good soil moisture by adding plenty of organic matter and mulch to the soil.
Hot temperatures can also take a toll on potatoes, especially when they follow a cold snap. The plants may lighten in color, dry up, and die. The tubers may become watery and dark. Protect your plants from the sun during periods of high heat to help prevent this.
Pests

The Colorado potato beetle, or potato bug, is widely considered the arch-enemy of potato growers. They are easy to spot thanks to their vibrant orange-red coloring and ladybug-like shape. You can usually eliminate them with a good dose of BT spray. They can also be prevented with diatomaceous earth, neem oil, or floating row covers. Ladybugs, lacewings, and beneficial nematodes provide excellent environmental control for this pest and many others.
Leafhoppers are tiny, lime green insects that hop away when disturbed. They lay their eggs inside the potato plant, and the offspring feed on the leaf surface after hatching. As they feed, they inject an enzyme that stunts growth and reduces yield. First, the leaves become discolored, then wrinkle, cup, and eventually turn brown at the tips.
Use floating row covers, diatomaceous earth, or insecticidal soap to prevent infestations. Beneficial insects such as ladybugs and lacewings will feed on leafhoppers along with other common pests. If needed, use an organic insecticide to control established populations.
Diseases

Common scab is something you have probably come across when buying potatoes from the grocery store. This bacterial disease causes rough, dark lesions on the skin of the tuber. Common scab does not affect edibility, but you should cut away the damaged portions when preparing the potato. You can prevent this disease by using scab-free seed, practicing crop rotation, and maintaining consistent soil moisture. Keeping the soil acidic, preferably under 5.2, is also very effective.
Late blight (Phytophthora) is the devastating disease that caused the Irish famine. It spreads quickly and can wipe out an entire potato crop in a single season. The spores usually begin on the foliage and then wash down into the soil, infecting the tubers. Blight causes sunken, water-soaked lesions that appear dark and may be tinged with purple, red, or white. Over time, the stems collapse and the tubers become inedible.
Any infected plants should be removed and destroyed immediately to prevent the disease from spreading. Do not store infected tubers with healthy ones, as spores continue spreading after harvest. You can reduce the risk of late blight by applying multiple small doses of a protectant fungicide during mid and late season.
Fusarium dry rot is a brown and black rot that can consume a significant portion of a potato. It enters through cuts in the skin, which makes seed potatoes highly susceptible, while progeny tubers tend to be more resistant. As the infection spreads internally, the tuber eventually collapses and develops a sunken, dry area on the surface.
You can prevent this disease from the moment you begin planting. Only plant seed potatoes that are disease-free or show only minimal dry rot. Before cutting the seed for planting, warm the tubers to at least 50°F (10°C). Cutting cold seed potatoes causes more tissue damage and increases the likelihood of infection.
Frequently Asked Questions
Can I grow potatoes from store-bought potatoes?
You can, but it’s not without risks. Store-bought potatoes may carry diseases that do more harm to your garden than good.
What’s the difference between seed potatoes and regular potatoes?
The seed potato is used for the sole purpose of growing potatoes for harvesting.
How many potatoes do you get per plant?
You can usually get 25 pounds of harvest potatoes from 1 pound of seed.


