How Long To Ferment Kimchi Using Kraut Source
Ever wondered how long to ferment kimchi when making your own? Not only will we answer that, but we'll provide a baechu-kimchi recipe to use!


Contents
Korean cuisine seems to have taken forever to become popular in the United States. It’s only been the last 10-15 years when it seems to have taken off like a rocket, likely aided by the interest in K-pop and a desire for something new. Among Korean dishes, kimchi is the best known and copied. Knowing how long to ferment kimchi has become a necessity! This fermentation process is required for making kimchi.
In Korea, special fermentation containers for homemade kimchi are available, and people there often have a special kimchi fridge to reduce the cabbage-like aroma around their other food. While a small batch of kimchi likely won’t leave a lingering scent, the containers aren’t readily available here.
Enter the Kraut Source fermentation kit, the perfect tool for making fermented foods. It attaches to the top of any wide-mouth, mason-style glass jar, enabling you to make perfect kimchi. We have a basic baechu-kimchi recipe for you to start with, but first, you’ll need the fermentation kit! We have it at the Epic Gardening Shop, along with a recipe book to use that fresh produce you’ve grown.


Shandong Hardneck Garlic – USDA Certified Organic

Shandong Hardneck Garlic – USDA Certified Organic
Stuff You’ll Need To Start

For this kimchi ferment, you’ll need the following necessary components:
- A Kraut Source fermentation kit
- A 1-liter wide-mouthed mason jar
- A large bowl capable of holding all of your garden vegetables,
- A colander,
- A wooden jar-packer, a pestle, large spoon, or flat-ended rolling pin,
- Sea salt, either US-supplied or Korean sea salt if you prefer it,
- Gochugaru, a Korean red pepper flake now widely available in US stores,
- Fish sauce (optional but definitely recommended unless you want vegan kimchi),
- Turbinado sugar, palm sugar, coconut sugar, or Sucanat – you want a light brown-colored sugar with a hint of molasses-like flavor, but not as strongly molasses-flavored as normal brown sugar,
- Distilled water (a gallon is usually enough unless you have a very large bowl),
- Fresh garden vegetables! In this recipe, you’ll want Napa cabbage, garlic, ginger, daikon radish, and green onions.
The Kraut Source fermentation kit is the easiest way for someone new to the fermentation process to get started. Making kimchi with it is simplicity itself! The stainless steel fermentation topper relieves pressure build-up in your kimchi jars on its own, meaning you won’t have to “burp” the jars once or twice a day to relieve the pressure caused by fermentation. A food-safe silicone gasket perfectly seals the topper to your kimchi jar, and the innovative moat on top of the jar ensures proper sterilization by keeping risky bacteria out of the equation.
The type of kimchi we’re discussing today is a baechu-kimchi, which roughly translates to “cabbage kimchi”. Baechu-kimchi is likely the most well-known version of kimchi in the United States, and is often made with Napa cabbages as opposed to other cabbage varieties. There are other forms of kimchi that highlight other vegetables as the main subject, but baechu-kimchi is widely used in kimchi jjigae (a common Korean kimchi stew), kimchi pancakes, to make kimchi fried rice, and as a condiment alongside other dishes. Kimchi can be eaten raw from the jar or cooked into other dishes, and it’s a wonderful entry point to Korean food.
Building Your Baechu-Kimchi

Let’s go over a list of exact measurements you’ll need to make kimchi! Fermented cabbage doesn’t happen without cabbage, after all.
For this kimchi, you’ll want to assemble the following ingredients:
- 1 head of garden-fresh Napa cabbage, about 2lbs or 900 grams,
- ¼ cup of sea salt or Korean sea salt (about 60ml) – be sure to use enough salt, as the sodium content is required for food safety,
- A gallon bottle of distilled water,
- 1 Tablespoon of freshly-minced garlic (about 15ml),
- 2 teaspoons of fresh ginger, grated finely (about 10ml),
- 1 teaspoon of turbinado sugar, Sucanat, palm sugar, or coconut sugar (about 5ml)
- 2 teaspoons of fish sauce (about 10ml) unless you’re making vegan kimchi,
- Gochugaru: if you want it mild, use 1-2 Tablespoons (15-30ml), but for increasing spice levels, you can raise this up to as high as 5 Tablespoons (75ml) depending on your personal preference,
- 8oz (230 grams) daikon radish, peeled and cut either into small squares or slender, short sticks,
- 4 green onion stalks with white parts, trimmed and cut into 1” pieces.
Begin by cutting your cabbage lengthwise into four quarters. Slice off the tough inner core and drop it into your countertop compost pail; you won’t need it for this kimchi. Slice each quarter of the cabbage crosswise into 2” wide strips.
Place your cabbage and your salt into your large bowl. With your hands, work the salt into the cabbage, massaging it in until the cabbage begins to soften. Once it starts to soften, add just enough water to cover the cabbage in the bowl, and use a plate with something heavy on top of it to weigh the cabbage down under the liquid. Let your salted cabbage sit in the water for an hour.
Once your cabbage has soaked in the salty water, rinse it under cold water and drain well. Let it sit in a colander for 15 minutes to allow any excess water to drip off.
While your produce is drip-drying in its colander, combine your sweetener of choice with the garlic, ginger, and fish sauce (if you wish to use it) in a bowl, stirring to fully combine into a paste. Add your gochugaru to this mixture; if you want it mild, 1-2 tablespoons are just fine, but for a spicy treat you can go as high as 5 tablespoons’ worth. Again, stir to fully incorporate the gochugaru into the paste.
Once the cabbages are done dripping and your spice paste is made, combine the cabbage, daikon radish, and green onions. Add the spice paste to the vegetables and thoroughly mix to coat everything with the paste. You can use your hands, but gloves are useful if you choose to go that route. If you don’t have a pair of clean latex gloves available, use either tongs or a salad serving set to fully work the paste through the future raw kimchi.
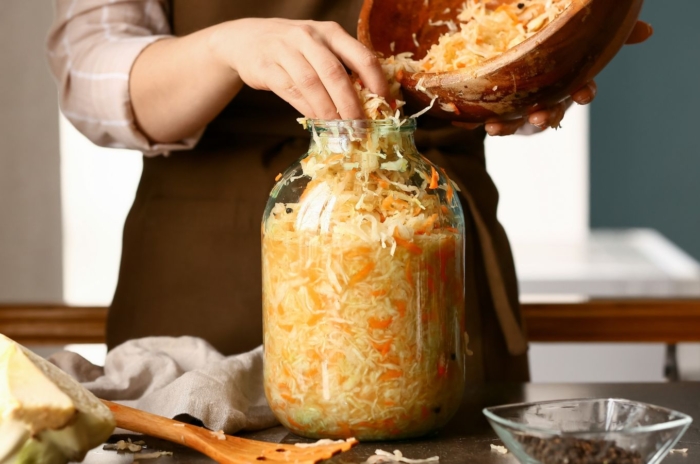
It’s now time to pack your vegetables into your kimchi jar! Place part of the vegetables into the jar, then use your jar packer, pestle, spoon, or flat-ended rolling pin to really pack them down. Repeat this process until you’ve filled the jar up to the shoulder or have run out of veggies, adding any seasoned brine that remains in the bowl. Ideally, you want 1” of brine above the veggies to keep your kimchi submerged. Too little liquid can result in spoiled kimchi, so if you’re short on brine, dissolve a teaspoon of sea salt in a cup of hot distilled water, and allow it to cool to room temp before topping off your jar with additional brine. A single large piece of cabbage can be packed in at the very top of the packed veggies to make sure no smaller bits float to the surface of the brine.
Place your Kraut Source on the jar, making sure that the silicone seal is tightly against the top of the jar, and screw it into place. Add water to the moat of the jar to keep harmful contamination out and place it in a cool, dark place. A constant temperature between 60-68°F (16-20°C) is ideal for fermenting kimchi. This cabbage can release quite a bit of liquid, so check on your jar regularly for the first 48 hours to make sure it won’t overflow. If it looks like the moat’s a bit high, pour some of the excess off.
Once your fermentation has finished, you’ll remove the Kraut Source lid and add a standard mason jar lid. Airtight containers are important for keeping your kimchi safe in the fridge.
How Long To Ferment Kimchi

There are a wide number of recommendations out there suggesting different time requirements for fermenting kimchi. In my experience, when I make kimchi, I like a fermentation time of at least 5 days. Initially as the lactic acid in the cruciferous veggies releases and starts to work, it will start producing tiny bubbles that slide up along the sides of the jar. The longer the fermentation time, the slower those bubbles will appear. In addition, long fermentation times make for a more sour kimchi. I generally don’t recommend more than 10 days of outside-the-fridge fermentation. Many people opt for about a week, and that’s usually just fine.
You can also ferment in the refrigerator, but the process is a lot slower this way as the ambient temperature is much colder. Using this method rather than making room temperature kimchi, you can easily triple the time of active fermentation. However, it should be noted that your kimchi will continue to ferment in the kimchi jar even after you’ve removed your Kraut Source topper, so open it occasionally to make sure it hasn’t built up pressure in the fridge. If you’re in a hurry to eat kimchi (and who wouldn’t be?), opt for the room temperature fermentation process and then store kimchi in the refrigerator to slow down fermenting.
Even in the fridge, if fermented long enough, your kimchi will gradually become sour. It’s better to make a smaller batch than a big batch if you don’t like the sour tang. I find that the taste of sour kimchi is best if used for cooking, instead of on its own as a side dish. That sour tang reduces once cooked. But a small batch can usually be consumed before it goes sour in the refrigerator, which means you get it right when the flavor is at your preferred level!
Some people like to have salty kimchi. Adding a little more salt over the quantity in the recipe above is absolutely fine, and in fact it’s delicious. However, try to avoid going overboard while making kimchi, too; too much salt (over 15% in the brine) can slow the naturally-forming lactic acid from doing its job.
One thing you may discover when your kimchi is being fermented: you’ll want good air circulation around the jar while it’s in its room-temperature fermenting phase. You will smell the cabbage and spice as it ferments, and it will definitely make you want to eat. Just think of the fact that when it’s done, it will taste good – far better than any store-bought kimchi ever will! You can’t buy kimchi when it’s at the height of freshness like what you can get from harvesting your own produce to make it yourself. The finished product is juicy, flavorful, and just simply amazing.
Your own kimchi will store in the fridge for a few months in its well-sealed, airtight jar. As it sits, it will continue to sour. Keep the veggies down under the liquid, and if any mold starts to form, it’s time to compost the contents of the jar and start a new batch.
Frequently Asked Questions
Can you open kimchi while its fermenting?
You can, and probably should after a week. Use a sanitized fork to fish out a piece to taste. If it’s to your liking, you can stop the process then. If not, you can let it continue to process with its Kraut Source lid in place.
Can you over ferment kimchi?
Yes and no. The longer it ferments, the more sour it will become. Generally, fermenting it for more than a couple of weeks outside the refrigerator is not advised as the lactic acid will continue to work on it in the fridge, albeit more slowly.
How long does it take for kimchi to bubble?
If kept between 60-70 °F (16-21°C), you should see initial bubbles forming within a couple of days. It can bubble for up to a couple of weeks, although most of the bubbles will die down within one week.