
Onions are an essential ingredient found in most kitchens all over the world. That’s why it’s so rewarding if we can grow and harvest our own fresh, healthy onions. They can be planted from onion sets, nursery-grown transplants, or onion seeds.
Some may prefer to grow onions from sets because they are widely available and it’s easier. However, planting onions from seed can give you the best results if you know the tricks to do it right.
Pick The Right Type of Onion

You should make sure that you choose the onion type which suits your garden conditions (soil, climate, etc.). There are three different types of onion for you to choose from:
- short-day
- long-day
- day-neutral
Short-day onions are perfect for those places where the days are slightly shorter throughout the growing season (between 10 and 12 hours in length).
In contrast, long-day onions prefer the areas where the days are longer (about 14 hours in length) for the bulb formation to be triggered.
Day-neutral onions grow best when the days range between 12 to 14 hours in length. The midsection of the U.S is a perfect place to grow this type of onion.
Use Fresh Seeds and Start Planting

Once you’ve chosen the right onion type for your garden, you will need to buy a fresh bag of seed-starting mix in spring. If you have a real winter, start the seedlings off indoors 8-10 weeks before your last frost date in spring.
Choose a container with good drainage and enough room for about 3 inches of dirt. Recycled fruit containers are perfect for growing seedlings. These kinds of containers are normally 4 inches deep and have lots of holes for drainage.
Step-By-Step Guide to Growing Onions From Seed:
Fill the containers with damp seed-starting mix, sprinkle the seeds evenly on top of the soil, mist them slightly with water, and then cover them with a 1/8 inch thick layer of seed-starting mix. Cover the seeds with the soil and then gently pat the soil down with your hand. Don’t forget to mark your trays with the variety and the planting date.
Use plastic bags to cover the seedling trays in order to conserve moisture, and place them in a warm location, such as near a wood stove or on the top of the fridge (where the temperature ranges from 21 to 24 degrees Celcius) for germination stimulating. You also can use a seed-starting heat mat if your home is too cold.
When the seeds have sprouted, take off the humidity dome and move the trays to a cooler place under the lights.
Keep the soil evenly moist and fertilized. The most popular fertilizers are fish emulsion, compost tea, and manure tea.
Trim the baby onion leaves to 3 inches long to keep the plants from getting too top-heavy and to give the roots more nutrients.
Transplant The Onions Into The Garden

The young onions need harden off before going into the garden, because the environment outside is totally different to indoors. They will need to gradually adjust to the sunlight, different temperature and humidity. You will need to put the onions in a sheltered location out of direct sunlight and wind, and let them stay there for 2-3 hours on the first day. Increase the time outside a little more every day, until the seedlings are outside overnight.
When the onions reach 4 inches in height, it’s time to move them to the garden. Before doing so, you will need to prepare a proper environment for these young plants. This includes weeding, tilling, and fertilizing with a fertilizer that’s rich in phosphorus. Make sure the planting bed or container (we recommend Root Pouch grow bags) is free of weeds and rocks. You can also add some organic material such as compost, rotted manure or grass clippings (you can collect grass clippings after mowing with a lawn mower).
Now you can transplant the onions to the planting bed. Rake the soil with a fork to loosen it and create holes for planting. Place the plants in those holes, ½ inch deep into the soil, 4-6 inches apart, depending on the size of the bulbs. Big bulbs will obviously need more space than the smaller ones.
Grow and Harvest The Onions

One of the most important parts of onion growing is regular watering and supply of nutrients. After you have transplanted the seedlings into the garden, don’t forget to moisten them frequently. They need at least 1 inch of water per week. Adding some nitrogen to the water will help to keep your onions healthy.
When the bulbs grow, the plants will need more moisture. So, if it’s too hot and dry, think about mulching in order to maintain the moisture in the soil. You can cover the planting bed with leaves or grass clippings, but keep them a little distance away from the onion plants so that the onions won’t get diseases or rot. In the bulb-enlarging stage, the plants will need more nutrients, especially potassium. If the onions get enough potassium, the necks won’t get thickened and the bulbs will store well.
As the onions mature, you should brush soil away from the tops of the bulbs, letting only the lowest part of the bulbs and their roots be in contact with the soil. By doing this, you will help the bulbs to dry out faster.

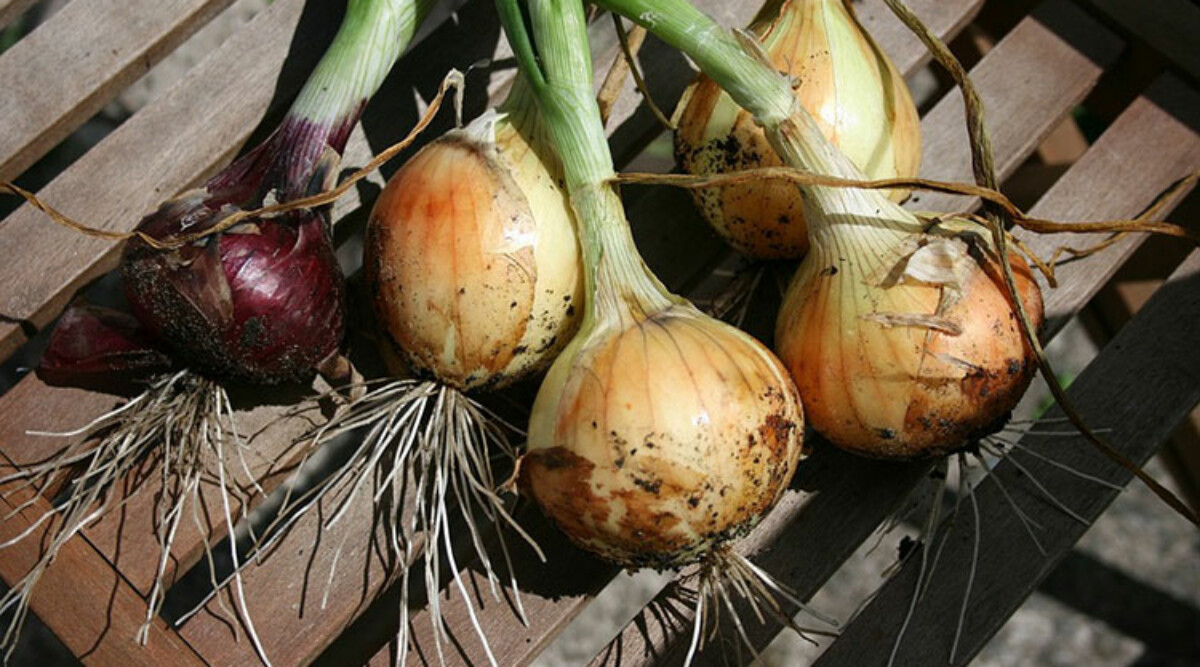
The onions are ready to be harvested when the bulbs have a diameter of 2 to 3 inches. You should let the plants go dormant before harvesting, otherwise they will not store well. Wait for a while till most of the onion tops have tipped over and turned to brown, and the bulbs have produced papery skins. Bend the bulbs to the ground to speed up drying. Once the tops have withered, you can pull the bulbs out of the ground and cure them in a dry, warm, well-ventilated place. Keep them spread out on a screen out of the sun, heat, and rain.
It takes around 3 weeks to cure onions. After that they will be ready for storing. A cool, dry location with good air circulation is an ideal place to store cured onions. You may braid the onion tops together and hang them up if you prefer. There are other ways to store onions, such as putting them in onion bags, or old nylon stockings, and hanging them up. Onions can also be stored in a shallow box with newspaper dividing the layers of bulbs.
After reading this article, you will hopefully understand the basic steps for growing onions at home. It’s not too difficult, and you will certainly be able to do it on your own. So, don’t hesitate anymore! Start planting, and you’ll soon have a bumper crop.
Author: Richard Clayton
I’m an owner of a small gardening shop. I love gardening, especially lawn care. I can spend all of my free time taking care of my lawn and discuss about lawn care experiences with my friends, who have the same hobby as me. My website (www.lawnmowertips.com) is a playground for us, where we can discuss everything about lawn care techniques.


