How to Plant, Grow, and Care for Brussels Sprouts
When you're growing Brussels sprouts, you get a great harvest after enjoying an unusual plant. Follow this guide by gardening expert Rachel Garcia to learn how easy it is to grow them yourself!

Contents
Everything is cuter when it is tiny, right? That makes Brussels sprouts one of the cutest veggies around!
Sadly, despite their adorable size, these baby cabbage lookalikes often get a bad rap, but that is usually due to user error. When overcooked, Brussels sprouts release sulfur, which is why so many people complain about the smell. When cooked correctly, they have a pleasant, nutty flavor. With just a little love, care, and seasoning, growing Brussels sprouts can make them the stars of your garden and your kitchen, so they are well worth a try.
Brussels sprouts gained their popularity and their name in Brussels, Belgium. Although they date back as far as the 1200s, these compact vegetables were not brought to the United States until the 1800s. Today, California grows most of the US Brussels sprout supply, but you do not have to live in the Golden State to grow them successfully.
In this guide, you will learn how to grow Brussels sprouts, along with tips for harvesting and preparing them. Follow these recommendations, and you may just change your mind about these delightful baby cabbages.
Long Island Improved Brussels Sprouts

Long Island Improved Brussels Sprouts Seeds


Quick Care Guide

|
Common Name(s)
Brussel sprouts, Brussels sprouts, sprouts
Scientific Name
Brassica oleracea var. gemmifera
Days to Harvest
90-110 days
|
Light
Full sun
Water
Consistently moist
Soil
Fertile, loamy, well-draining
|
Fertilizer
At least 2x per season, possibly more
Pests
Cabbage worms, cabbage loopers, flea beetles, root maggots
Diseases
Blackleg, black rot, Alternaria leaf spot
|
All About Brussels Sprouts

They may look different, but Brussels sprouts are very closely related to kale, cauliflower, cabbage, and broccoli. These are all varieties of Brassica oleracea, commonly known as wild cabbage. Over time, wild cabbage has been selectively bred into several groups, including the beloved sprout group.
If you look closely, you will notice that Brussels sprouts share many traits with other Brassica groups. These vegetables are excellent nutrient storers, making them some of the healthiest foods you can grow and eat. They also produce seeds in silique fruit, which are dry pods that hold seeds internally. Most Brassica vegetables are biennials, meaning they flower after two years of growth.
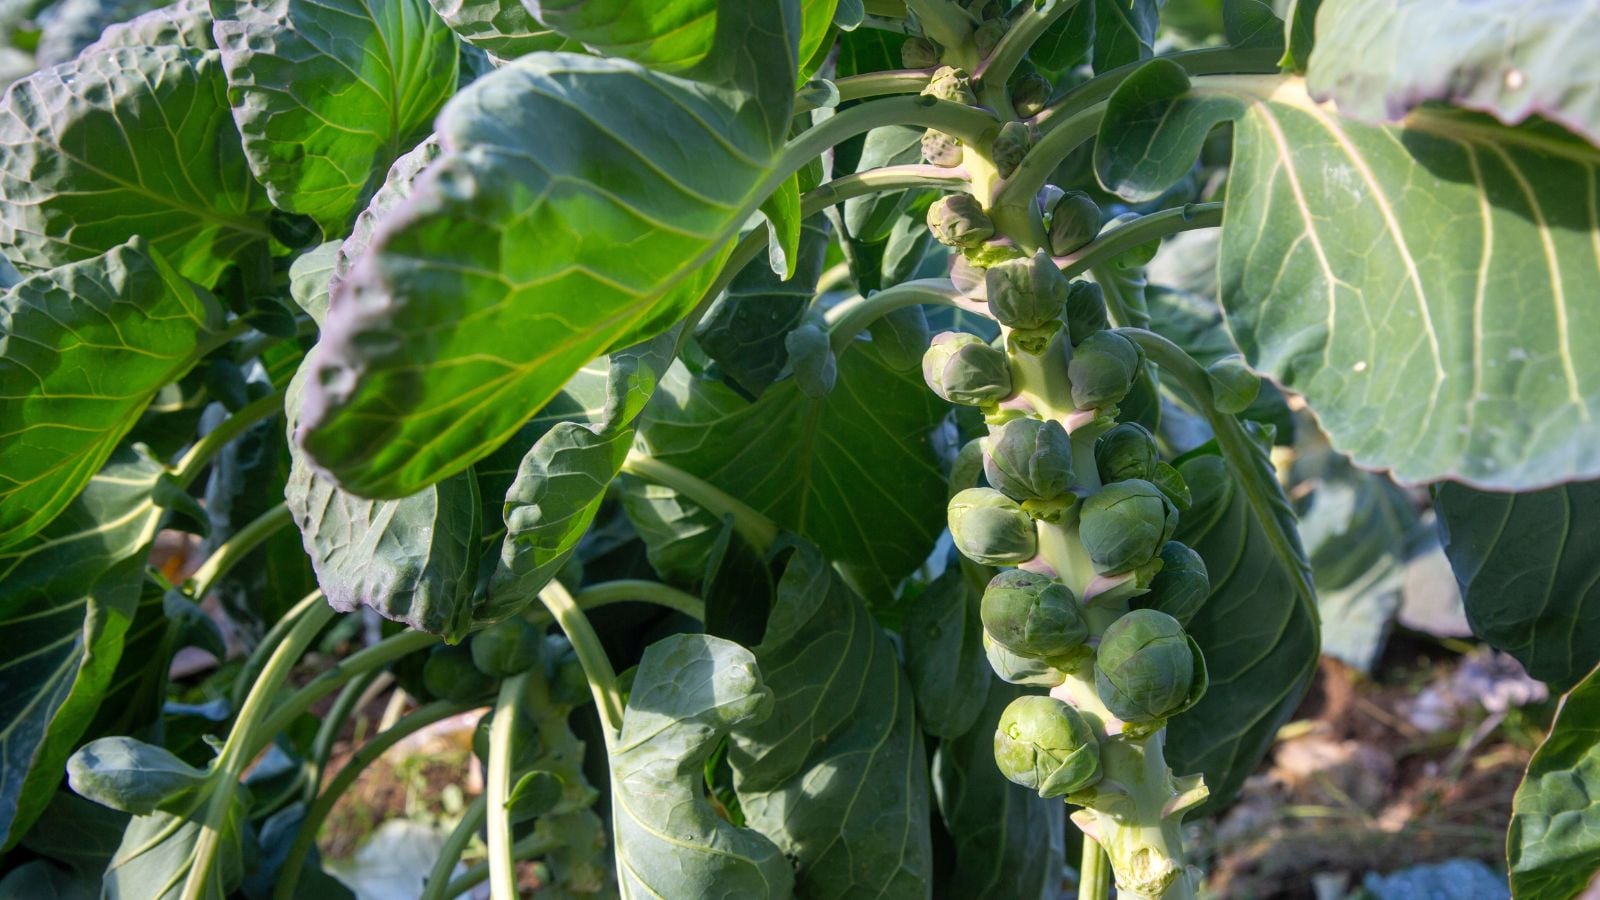
Brussels sprouts closely resemble cabbage early on. As the plant matures, cabbage-like leaves rise along a strong central stem that grows 24 to 36 inches tall. The leaves continue to expand and drape over the stem. When the leaves are gently pushed aside, you can see small, round Brussels sprouts forming directly along the stalk. By harvest time, the stem is often completely covered in sprouts.
There are many Brussels sprout cultivars to choose from. For classic green, medium-sized sprouts, try ‘Dagan’ or ‘Jade Cross’. Early-maturing options include ‘Churchill’ or ‘Tasty Nuggets’, with the former producing particularly small sprouts.
For added visual interest in the vegetable garden, colorful cultivars are also available. ‘Red Rubine’ and ‘Redarling’ feature striking reddish-purple foliage, while ‘Falstaff’ offers a cooler blue-purple tone. Most colored cultivars have a slightly sweeter flavor than green types and retain their color well during cooking.
Planting

To harvest just after the first fall frost, seeds should be planted about four weeks before that date. In most climates, this means sowing seeds in the ground in June or starting late-blooming varieties indoors in May. In warm climates, seeds are typically planted in mid-summer, with harvests taking place in late fall or early winter.
Begin with well-draining soil and incorporate organic matter to improve fertility. Plant Brussels sprout seeds half an inch deep and space them three to four inches apart. Once seedlings have developed at least five strong leaves, transplant them outdoors or thin in-ground plants to 18 inches apart.
Choose a planting location that receives plenty of sun without excessive direct heat. Applying mulch around the base of each plant can help retain moisture and suppress weeds. Whether you mulch or not, gently firm the soil around the plants without compacting it.
How to Grow
You’ll need to pay special attention to your baby cabbages for them to thrive. Trust us, though, it’s well worth the effort!
Light

Grow Brussels sprouts in a place where they’ll get at least six hours of full sun. Keep them out of the shade, as this can stunt their growth.
Water

Strike a balance by keeping the soil consistently moist without overwatering. Depending on the temperature, Brussels sprout plants need about one to one and a half inches of water per week. To reduce the risk of disease, water only at the base of the plant so the leaves and stem stay dry. A soaker hose works especially well for this and helps deliver water slowly and evenly.
It is best to water in the morning so plants have adequate moisture throughout the day. Brussels sprouts have higher water needs during warm weather, so if you are starting them in summer, keep the soil evenly moist until cooler conditions arrive.
Soil

Plant Brussels sprouts in loamy soil that drains well. If the soil is not already rich in organic matter, incorporate well-composted material before planting. These plants respond especially well to cow manure, horse manure, and plant-based composts.
Brussels sprouts prefer neutral to slightly alkaline soil but will still grow reliably in soil with a pH as low as 6.5. Grow in raised beds if you need more control over soil conditions.
Temperature and Humidity

These are cool-weather crops that grow best in zones 2 through 9. The ideal temperature range is 45°F to 75°F (7°C to 24°C), although plants are fairly adaptable. Extended periods of high heat can cause Brussels sprouts to develop a bitter flavor.
Brussels sprouts can tolerate light frost and often overwinter successfully in warm climates where winter temperatures do not drop below 20°F (-7°C). In colder regions, they are best grown as annuals rather than overwintered.
Fertilizing

Fertilize Brussels sprout plants at least twice during the growing season. Side dress once the plants reach about a foot tall. After that, continue fertilizing every three to four weeks, or every three weeks during periods of consistent rainfall.
Use a nitrogen-rich fertilizer, but avoid excess nitrogen. Too much nitrogen encourages leafy growth at the expense of sprout development along the stem. A 10-20-10 or 13-13-13 fertilizer works well. For organic options with lower NPK values, choose a 5-5-5 or 5-7-5 and apply about every two weeks. Adding blood meal before planting can also provide an early nitrogen boost to support initial plant growth.
Pruning

Pruning is not a required part of growing Brussels sprouts, but it can be helpful when done at the right stages of plant growth. Strategic pruning can extend the growing season and encourage better sprout development by redirecting the plant’s energy.
When the first sprouts begin forming at the bottom of the stem, remove the lower five to eight leaves. The Brussels sprout plant will redirect energy and nutrients away from those leaves and into sprout production. Repeat this process gradually as lower leaves yellow and die back.
Be careful not to remove more than one-third of the plant’s total foliage at any time, as excessive pruning can stress or damage the plant.
Propagation
The Brussels sprout plant is a biennial, meaning it takes two years to mature and produce seed. To save seeds, plants must be overwintered and allowed to flower the following fall. The tops of the plants produce yellow, cross-shaped flowers, which is why members of this family are known as cruciferous vegetables. As flowering finishes, seeds develop inside siliques, which are dry, valve-like seed pods.
If left on the plant too long, siliques will eventually split open and release their seeds. Harvest the siliques before this happens to avoid losing seeds to birds or natural dispersal. Cut the siliques from the plant and gently crack or slice them open to remove the seeds. Store seeds in a dry location and use them within four years for best germination.
Some gardeners also experiment with propagating Brussels sprouts from the sprouts themselves, including those purchased from the grocery store. While success varies and growth is slow, the process is straightforward.
Cut a sprout cleanly from the stem, as close to the base as possible. Place it upright in clean water, submerging only the base. One simple method is to fill a plastic bottle to the top and rest the sprout over the opening so the base stays wet. Keep the water level consistent, and white, fibrous roots should begin to form. Once roots are established, transplant the sprout into soil or move it into a permanent hydroponic system.
Harvesting

Who would have thought that early fall would bring pumpkin, squash, and sprout harvests? These cool-season vegetables can go from garden to plate in very little time.
Frost actually improves the flavor, so wait until after the first fall frost to harvest Brussels sprouts. As the plant prepares for winter, the lower leaves begin to yellow, and second-year plants will start shifting toward seed production. Sprouts mature from the bottom of the stem upward and are typically ready when they reach about one inch in size, depending on the variety. If left on the stem too long, they may split open and develop a bitter taste.
Harvesting Brussels sprouts is straightforward. Sprouts can be picked individually by twisting them off the stem by hand. Another option is to cut the entire stalk at the base and leave the sprouts attached until you are ready to use them. The leaves are also edible and can be harvested as well, making an excellent substitute for cabbage.
In ideal conditions, plants may produce a second, smaller harvest. This can be encouraged by extending the season with straw mulch and row covers to protect plants as temperatures continue to drop.
Storing
Brussels sprouts become stronger and more bitter in flavor as they mature, so they taste best when eaten within three to four days of harvest. They can last a week or longer when stored in a plastic bag in the crisper drawer of your refrigerator.
Before storing, remove any yellowing or rotting leaves, and avoid washing the sprouts until you are ready to use them. Keeping Brussels sprouts attached to the stalk until cooking will help maintain freshness for a longer period.
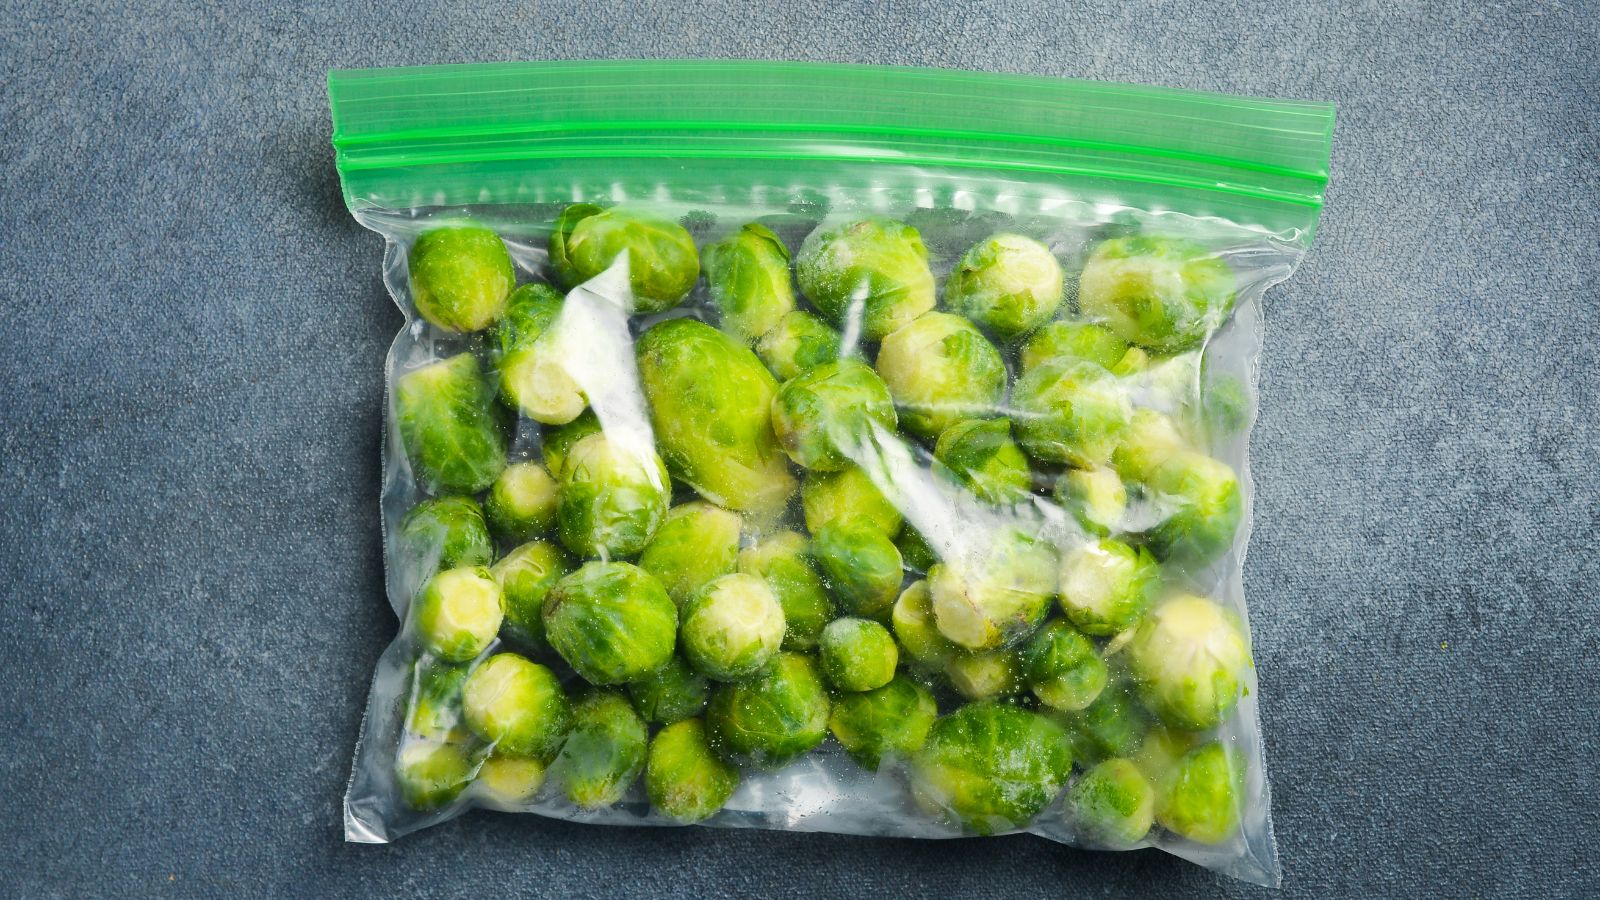
For long-term storage, Brussels sprouts can be frozen for up to one year. For the best flavor and texture, blanch the sprouts before freezing. If you prefer a quicker method, rinse them to remove dirt, pat them dry thoroughly, and store them in a resealable freezer bag.
Troubleshooting
Most issues with learning how to grow Brussels sprouts can be cured by following the care directions and rotating the crops each year with non-cruciferous plants. Accidents happen, though, so here’s what you should be on the lookout for.
Growing Problems

If your Brussels sprout plants are not growing well or are producing few sprouts, they likely need additional nutrients. Keep the soil rich in organic matter and apply fertilizer as needed throughout the growing season.
Another common issue is loose or fluffy, non-compact sprouts. This is often linked to low soil fertility, overly loose soil, or the cultivar itself. Brussels sprouts need to be well anchored in the soil so you can pull off a leaf without the entire plant lifting out of the ground. Hybrid varieties are generally more reliable when it comes to producing tight, compact sprouts.
Harvesting too early, before cold weather arrives, often results in bitter-tasting sprouts. For the best flavor, wait until after the first frost before harvesting and plan planting dates accordingly. It can also help to choose a variety known for the level of sweetness you prefer.
Pests

Cabbage worms and cabbage loopers love cruciferous plants, and Brussels sprouts are no exception. These larvae chew holes through the leaves and often cause spotting on the undersides. If you spot them on your plants, apply Bacillus thuringiensis (BT) or a pyrethrin spray to control the infestation.
Flea beetles lay their eggs in the soil and quickly begin feeding on foliage. Spinosad or pyrethrin sprays are effective treatments. To prevent damage, use floating row covers early in the season or apply neem oil as a deterrent.
Below ground, root maggots can become a serious problem for Brussels sprouts. These immature flies feed on the roots, causing plants to yellow, weaken, and eventually die. Crop rotation and tilling the soil after harvest can help prevent infestations. If root maggots are already present, beneficial nematodes can be used to reduce their numbers and protect your plants.
Diseases
Blackleg is a dangerous fungus that prefers warm, wet conditions. It can stunt your sprout’s growth, reduce yield, and even kill the plant. There is no foolproof cure for this fungus yet, so it is essential to take preventative measures. Keep your plants dry and clean up any debris on the ground. Also be sure to clean your gardening tools after each use, as fungal spores can easily hitch a ride on them.
If you still end up with a blackleg problem, destroy all infected plant material and do not replant in that soil for at least four years. You may also want to solarize the soil as an extra precaution.
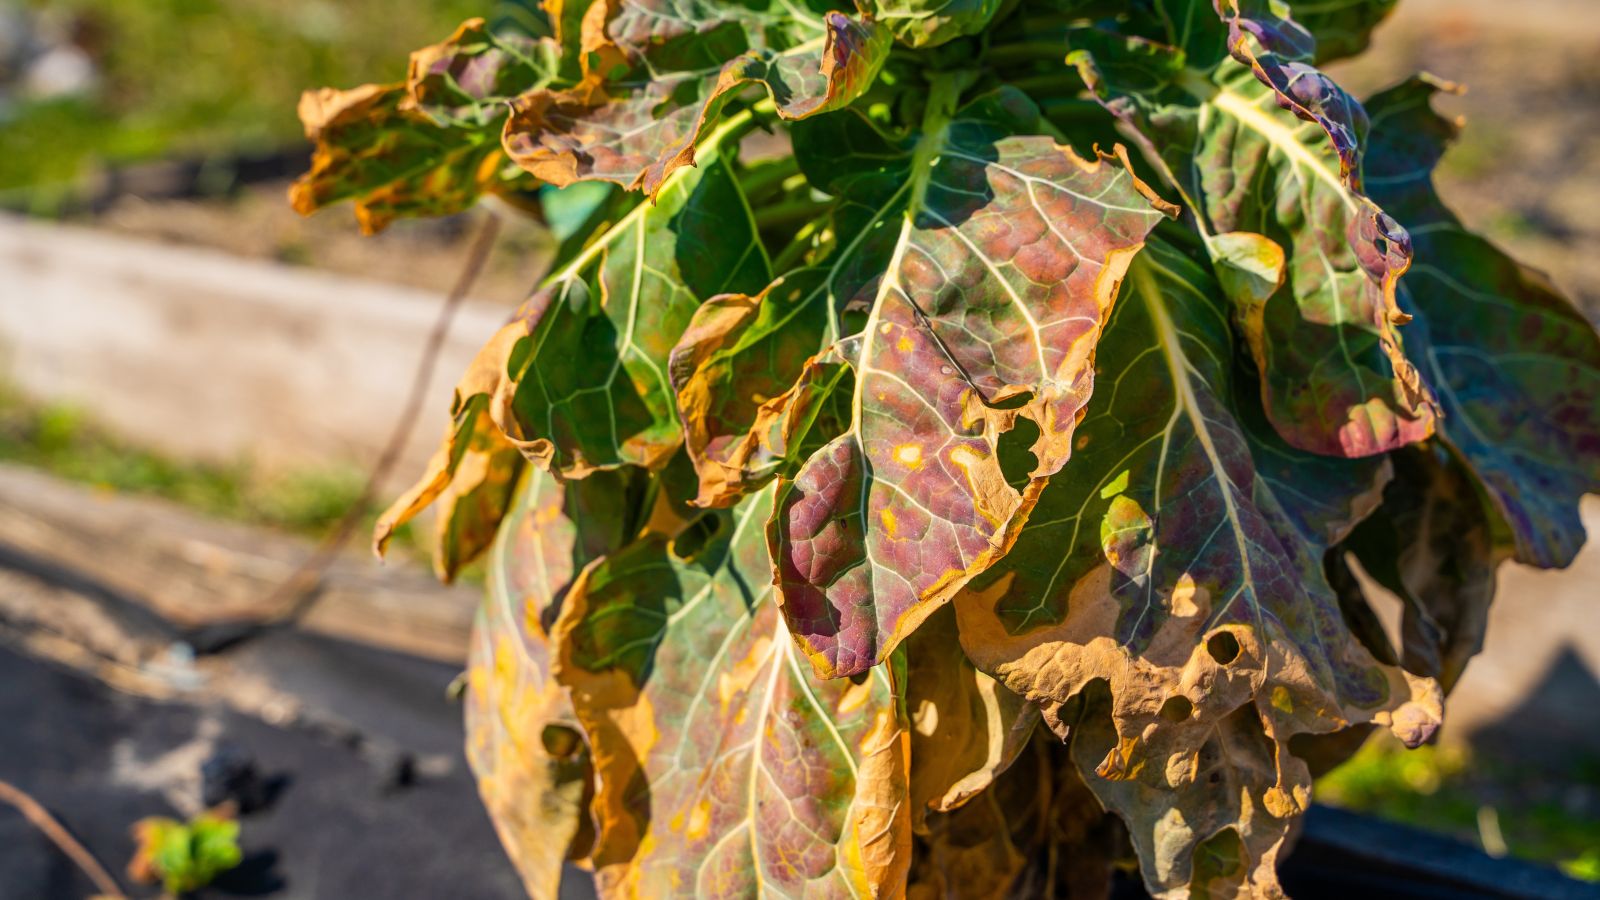
Black rot is a bacterial disease that causes V-shaped yellowing on the leaves. If left untreated, it can prove fatal to plants. As with blackleg, keeping your plants dry is key. Infections may be treated with copper fungicide, although prevention is the best approach.
Brussels sprouts are also susceptible to Alternaria leaf spot. You will notice soggy, dark-colored spots on the plant, often with a yellow ring around them. Focus on prevention by applying neem oil or Bacillus subtilis. If the disease has already invaded your plants, treat them with copper fungicide or a sulfur-based fungicide.
Frequently Asked Questions
Do Brussels sprouts make you fart?
Brussels sprouts have a lot of cellulose, which is difficult for our digestive systems to break down, so yes, this can happen. The good news is that if you consistently eat lots of veggies, your system will adapt and you won’t have to worry about being gassy anymore.
Are Brussels sprouts just small cabbages?
No, though they’re closely related. Unlike cabbage, which grows settled on the ground, Brussels sprouts grow on the side of a long, flower-topped stem.
How many Brussels sprouts do you get from one plant?
It depends on the cultivar, but most will produce 50-100 sprouts. That’s 3-4 pounds of green goodness!


