Air Plant Display: How to Mount Tillandsias
An air plant display can be much more than a piece of wire or a seashell. These epiphytes can become indoor gardening features with a couple of mounting steps. We'll show you how to mount air plants on wood as a wall display!

Contents
If you love bringing the outdoors indoors, air plants are a great way to do it. These resilient, low-maintenance plants do not need soil or rocks to grow, nor do they require an elaborate stand. You can easily DIY an air plant display using items you already have on hand and tailor it to almost any style.
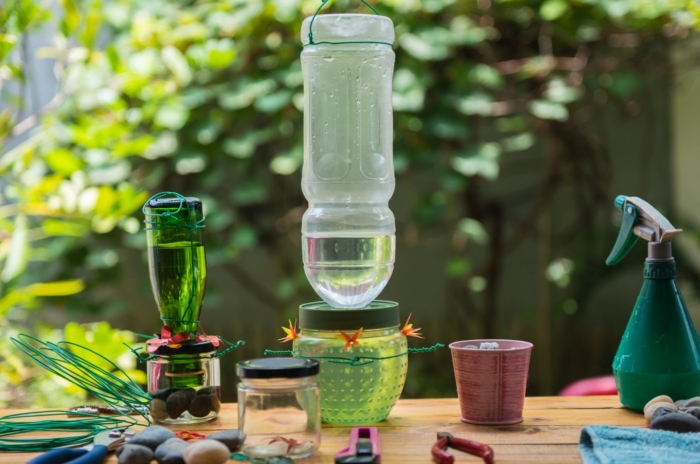
A simple yet beautiful display can be created by placing air plants in seashells for a relaxed, beach-inspired look. For a more modern aesthetic, a spiral of wire can serve as a sleek holder. Glass terrariums are another option if you prefer to keep your plants in a dust-free environment.
If you enjoy crafting, macramé plant hangers can be used to create custom holders that can be hung from hooks or rods. For a more natural feel, repurposing driftwood, bark, moss-covered boards, or other organic materials makes an attractive and understated display. There are so many options.
Next, it is helpful to look at what you will need to mount and display your air plants. There are many ways to showcase them, so take the opportunity to get creative. Air plants make a fun, flexible, and easy-to-care-for living décor element in the home.
Ina Wall Trellis Large

Hand welded steel frame, stainless steel cable, hard wearing and water resistant zero-VOC powdercoat finish or natural oxide finish. Handmade in the USA. Original, copyrighted design by TerraSculpture /TerraTrellis.
Buy at Epic Gardening Shop
Materials You’ll Need
There are a variety of components you’ll need to do this project. Here are some detailed tips for each element.
Selecting Air Plants

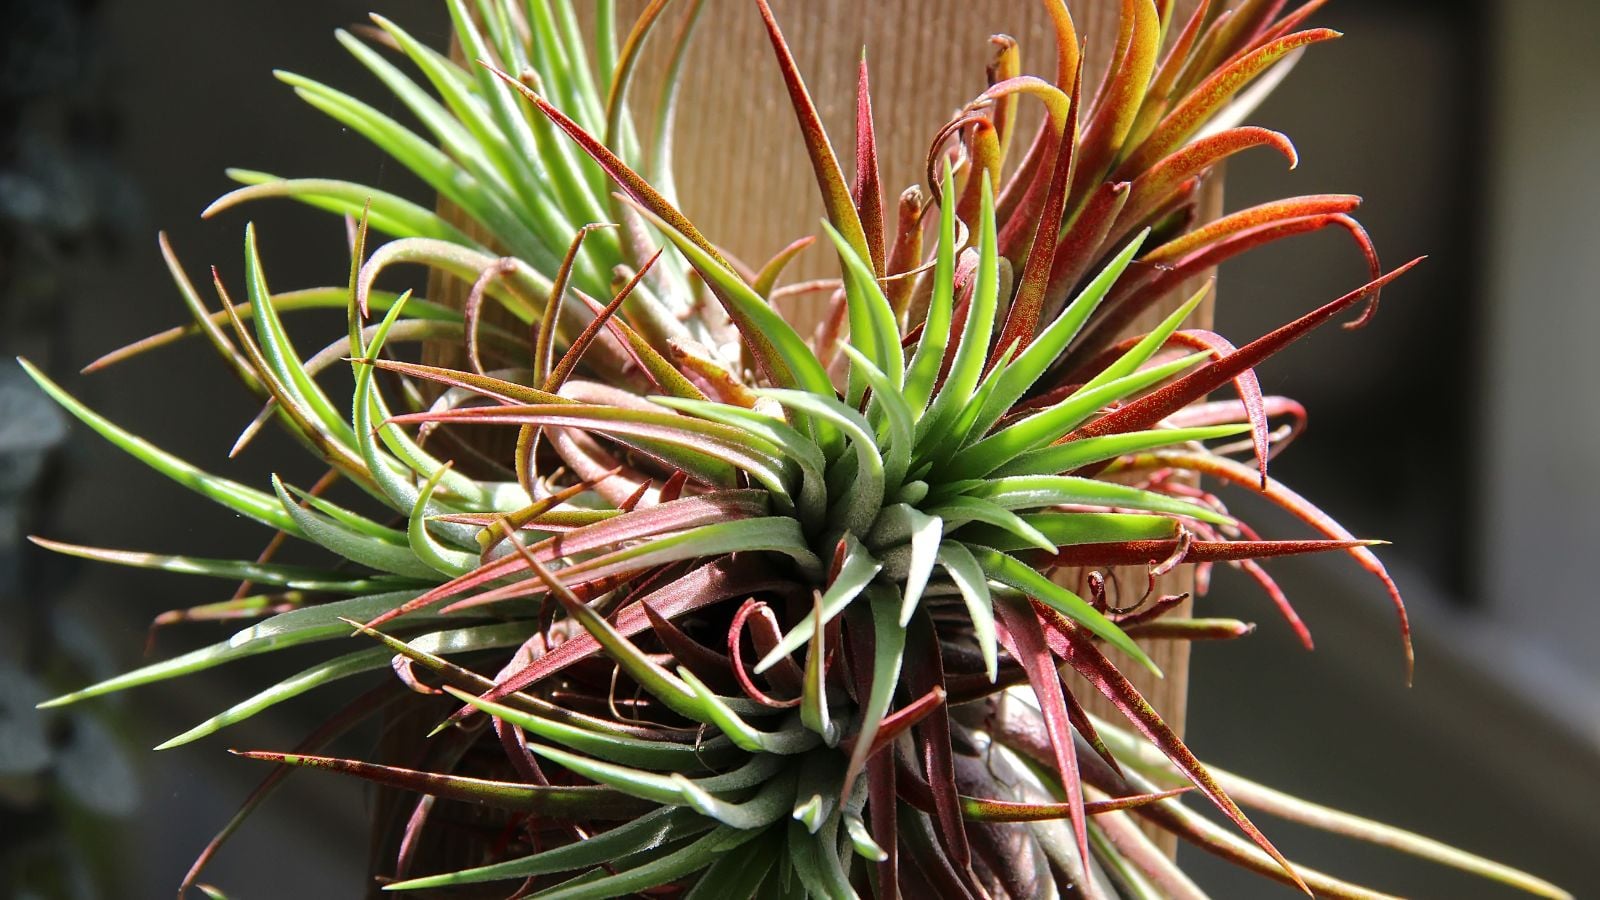
When making an air plant holder, you will of course need air plants.
I like to source my air plants first when planning a project like this. They will live just as happily in a cereal bowl for a few days as they will in a terrarium or decorative planter. There are many species of air plants to choose from, just as there are many air plant display ideas, so take time to search for varieties you will enjoy.
How many plants you need depends on the size of the display you are creating. If you want to save some money, purchasing multiple plants is often the best value. These can be found online or ordered directly from an air plant nursery if they are not available locally.
Once they arrive, carefully unpack them and arrange them on a table to get a sense of their scale. This gives you a clear idea of how large the display will need to be.
Mounting Air Plants on Wood

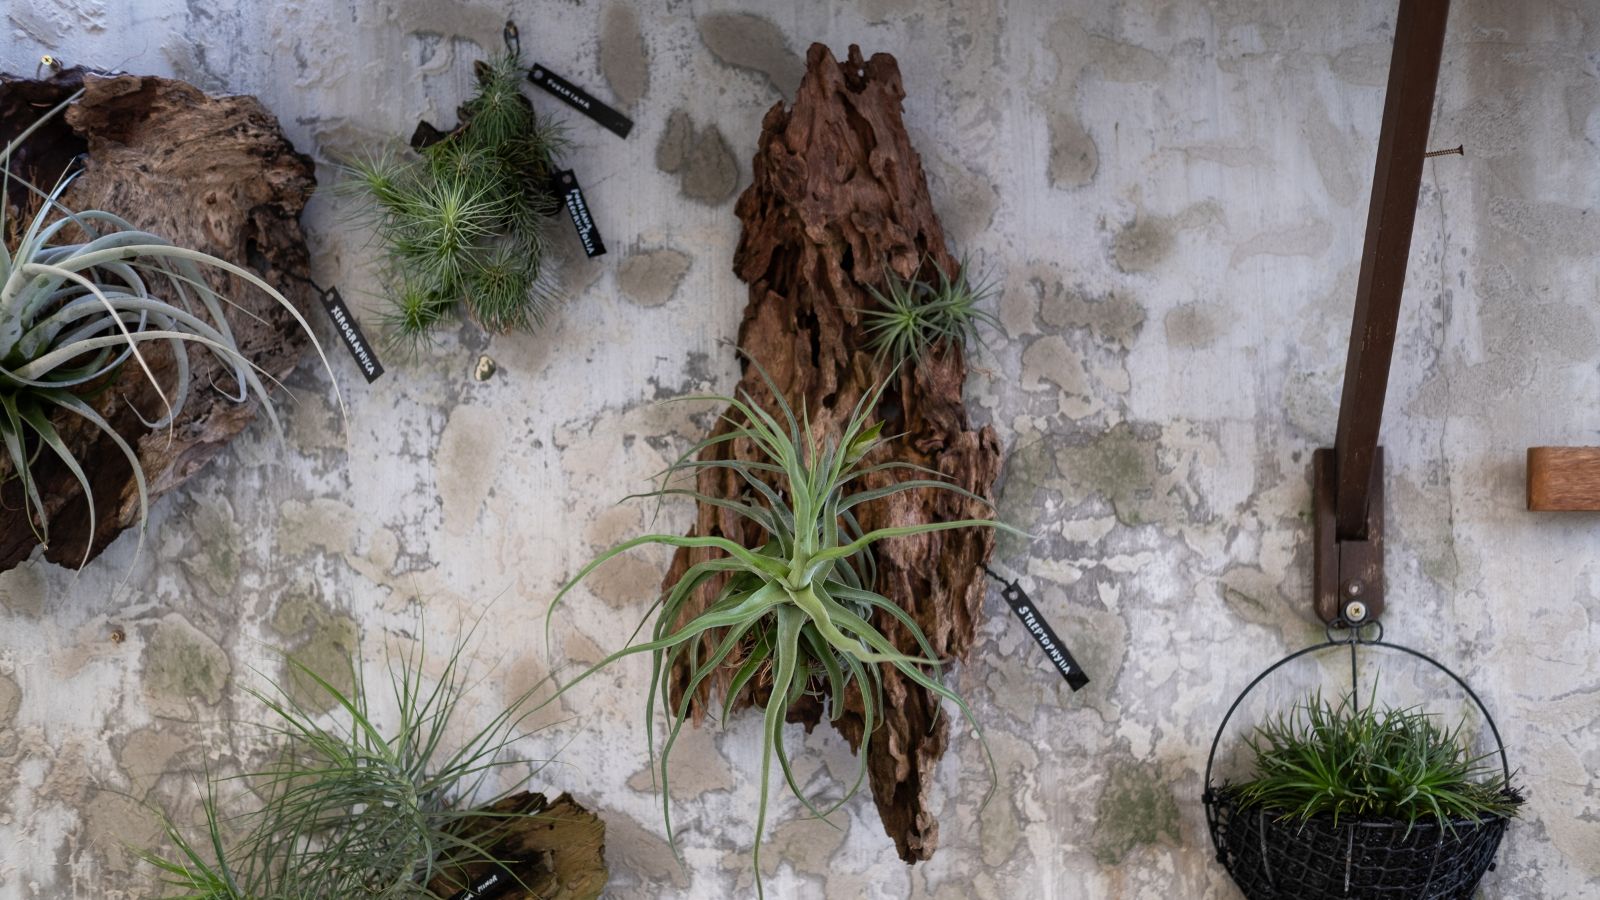
Driftwood was one of the most common mounting options. Depending on where you live, locally sourced grapewood may also be easy to find. This dense vine wood twists into interesting shapes and often has knots or holes from years of pruning, making it an ideal way to display tillandsia plants.
If you like a natural look but prefer something less vine-like, a sheet of cork bark, such as those sold at pet stores for aquariums or reptile enclosures, also works well as a DIY mounting surface for air plants. Look for pieces with deep nooks and crevices where the plant bases can be tucked in securely. Even an old, weathered picture frame can be repurposed to mount plants as an indoor display.
Keep in mind that air plants are mounted permanently, so whatever material you choose must tolerate getting wet. While air plants do not require frequent watering, they do need occasional moisture, and the mounting surface must handle exposure to water. If you cannot find a waterproof surface, consider creating individual wire holders so the plants can be removed for a twenty-minute soak every couple of weeks.
Grapewood, along with most branches sold for reptile enclosures, can handle regular moisture, which makes it especially well suited for this purpose.
If you plan to hang the display on a wall, decide on a hanging system ahead of time. This allows you to plan the placement of the air plants more effectively before mounting them.
Other Materials

You now have most of the materials for your air plant holder, but the next step is deciding how to mount the plants.
If your chosen surface is not waterproof, metal wire is the best option. A heavy-gauge craft wire works well. Avoid copper, as it can discolor the base of the plant over time. Nickel, steel, or aluminum wire are all good choices. You can opt for a polished metal for a clean look or use a coated wire in a bright color for something more playful.
When working with wire, you will also need a drill and a drill bit that matches the diameter of the wire. Pliers and wire cutters are also helpful tools to have on hand.
The only other essential supply is glue. There are two adhesive options that are safe for air plants, and both create a slightly flexible bond once dry, allowing room for plant growth.
The adhesive I recommend is E-6000. This industrial adhesive creates a permanent, waterproof bond that does not discolor or weaken over time. It can sometimes be difficult to find in local stores, so you may need to order it online.
Hot glue is another viable option, but care is required to avoid burning the base of the air plants. If possible, use low-temperature glue sticks to reduce the risk of heat damage.
Twine or rope can also be useful during the mounting process, although they are optional rather than essential.
Making Your Air Plant Display

If you have not already done so, decide how you want to hang the display if it will be mounted on a wall. If it will be placed on a table or shelf, make sure it sits flat and does not rock on the surface, as wobbling can damage the plants. Sanding flat areas to create a flush, stable base works well.
Prepare the plants as well. Remove any loose leaves and make sure the base of each air plant is exposed. Give the plants a twenty-minute soak in water to fully hydrate them, then allow them to air-dry.
Once the plants are dry, place the display in its intended location. This is the time to plan the final layout. Arrange the plants on the driftwood or bark, testing different positions and using natural nooks and crevices.
Move plants around until the arrangement feels balanced and visually appealing. This is an indoor garden feature, so taking time to refine the layout will ensure it enhances your space.
Attaching

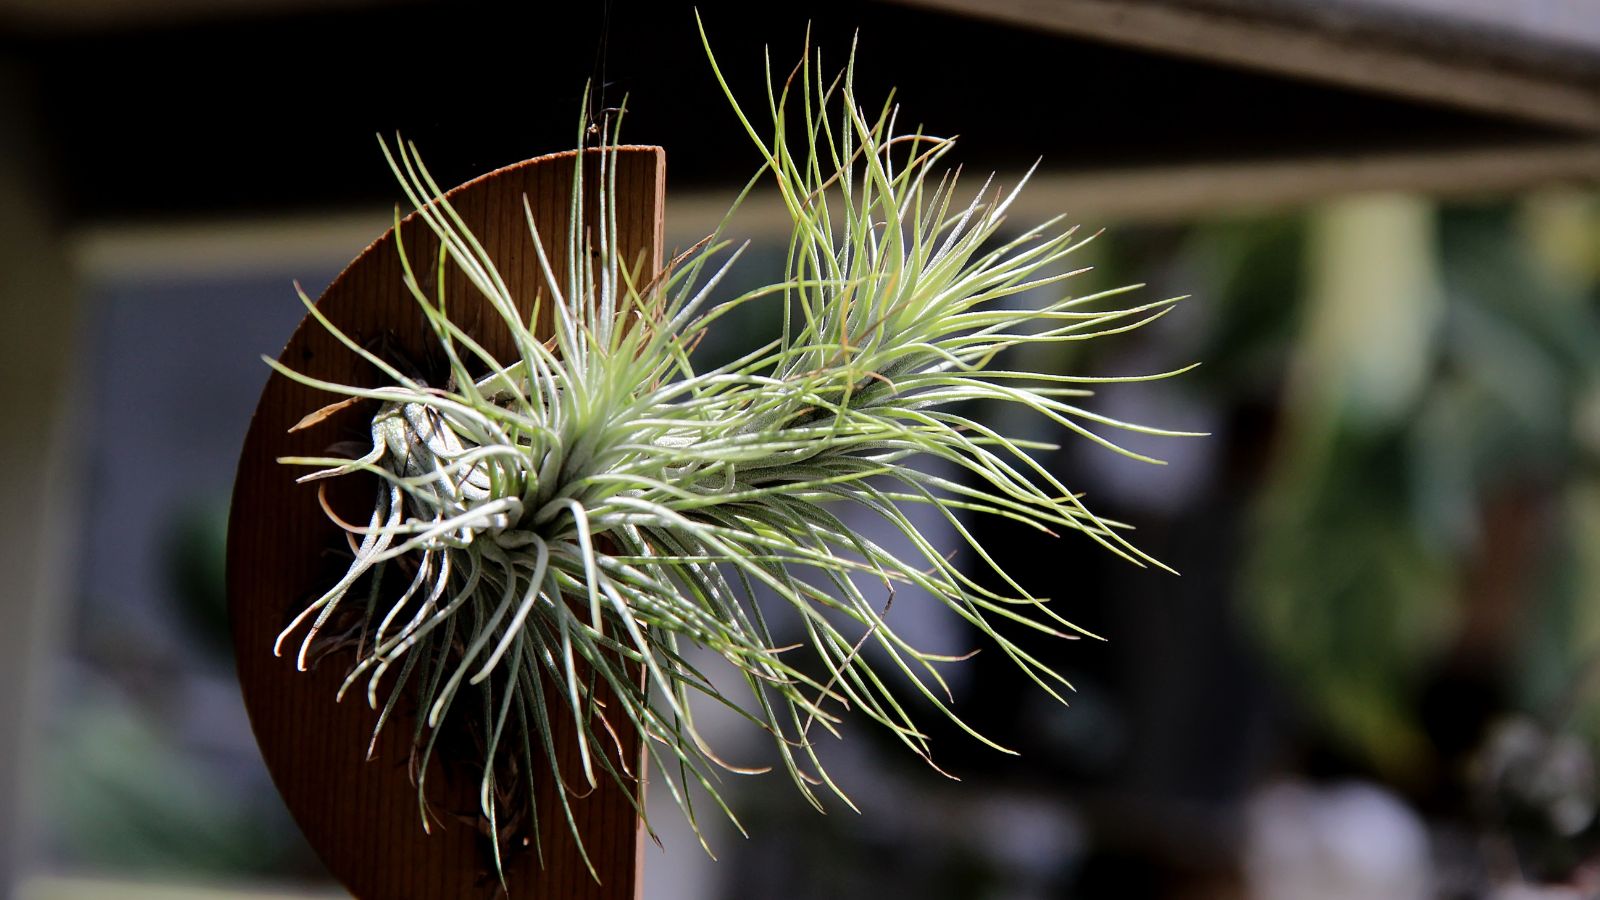
Once you have decided where each plant will stay permanently, uncap your E-6000 or heat up your glue gun. If you are using a glue gun, place a generous amount of glue onto the display where the plant will sit. If you are using E-6000, apply the adhesive directly to the base of Tillandsia ionantha.
Since this plant does not have roots, it relies on the glue to anchor it in place. Avoid getting adhesive on the leaves whenever possible, as leaves may drop as the plant continues to grow. This is a living arrangement, after all.
Press the tillandsia gently into place, using just enough pressure to ensure full contact. When working with E-6000, you may want to tie the plant in place temporarily with a piece of twine, taking care not to damage the leaves. Hot glue usually bonds within a few seconds, while E-6000 requires light pressure until it fully sets.
Repeat this process one air plant at a time, taking care to orient each plant in a way that highlights its shape and best features. If a plant fits naturally into a bend in the driftwood or its base sits neatly inside a knothole, take advantage of that placement. The goal is a natural look, similar to how the plants might appear in the wild.
If your air plant display cannot tolerate being soaked in water, wire mounting is a better option. Start by shaping the wire into a spiraling cone that fits snugly around the base of the air plant and can support its weight. Leave enough extra wire to form a stem for mounting.
Decide where the plant will go on the display, then drill a shallow hole using a drill bit that matches the diameter of the wire. Fill the hole with glue and insert the wire stem. This method allows you to remove the plants easily for regular soaking while keeping the display intact.
Caring For Your Air Plant Display
Now that your air plants are secure, their day-to-day care is easy.
If you are hanging them, remove the plant hanger from the wall or ceiling every one to two days and give each plant a light spritz with a misting bottle. About every two weeks, submerge the entire display, or just the plants if you used a wire mounting method, in room-temperature water for 20 minutes to allow the plants to fully plump up.
Once a month, air plants benefit from an air plant-specific fertilizer diluted in water and applied in place of regular misting. Always allow the display to dry completely before hanging it back on the wall.
You can create an entire garden of silver-green air plants in a very small space, customized exactly to your taste. Because no soil is needed, there is no concern about planters or pets spilling dirt indoors. Air plants can even be mounted on rocks or suspended upside down inside seashells to create a living Tillandsia “octopus” ornament, which makes a charming and unique gift.
No matter how you choose to display your air plants, whether hanging or stationary, in glass terrariums or mounted on grapewood, they make it easy to bring more life into your home.